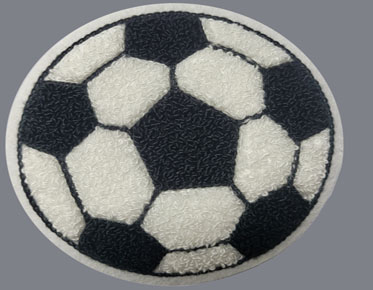
The Basic Steps of Creating Chenille Embroidery Designs
Chenille embroidery is a unique and beautiful form of needlework
that adds depth and texture to your designs. Unlike traditional embroidery,
chenille is created by using a series of stitches that create a looped pile on
the fabric. This technique creates a plush, velvety texture that is perfect for
creating eye-catching designs on a variety of materials, from clothing to home
decor. Use these guidelines from Eagle Digitizing to find the best machine for your needs.
If you are interested in creating chenille embroidery designs, the
following steps will provide you with a basic overview of the process:
Step 1: Choose Your Fabric and Threads
The first step in creating a chenille embroidery design is to choose
your fabric and threads. Chenille can be worked on a variety of fabrics,
including cotton, wool, and silk. It is important to choose a fabric that is
strong enough to withstand the stress of the chenille stitching, but still has
a soft and plush feel.
The threads used for chenille embroidery are also an important
consideration. Chenille threads are typically made from rayon or silk and are
thicker than traditional embroidery threads. These threads come in a variety of
colors, so you can choose the perfect shade to match your design.
Step 2: Transfer Your Design
Once you have chosen your fabric and threads, you need to transfer
your design onto the fabric. There are several ways to do this, including
tracing the design onto the fabric with a pen or using a transfer pencil. It is
important to make sure that the design is centered and straight, as any slight
inaccuracies will be magnified by the chenille stitches.
Step 3: Begin Your Stitches
Chenille embroidery is created using a series of straight stitches
that are worked back and forth over the same line. To start, take a stitch in
the fabric and then bring the needle back up through the fabric a short
distance away. Take another stitch, but this time bring the needle up through
the fabric a little further away, creating a loop of thread. Repeat this
process, working your way back and forth across the design, until you have
created a series of loops.
Step 4: Cut the Pile
Once you have completed your stitches, it is time to cut the pile to
create the plush, velvety texture of chenille. Using a pair of sharp scissors,
carefully cut the loops of thread along the center of the design, being careful
not to cut the fabric. After you have finished cutting, gently brush the fabric
to fluff up the loops and create the chenille pile.
Step 5: Finish Your Design
The final step in creating a chenille embroidery design is to finish
the edges of the design. You can do this by simply trimming away any loose
threads or by adding a decorative border. This can be done using a variety of
stitches, including a satin stitch or a chain stitch.
With these basic steps, you can create a beautiful chenille
embroidery design that is sure to impress. Whether you are working on a piece
of clothing or a home decor item, the plush, velvety texture of chenille
embroidery is sure to add a touch of elegance and sophistication to your
project. So why not give it a try today and discover the beauty of chenille
embroidery for yourself?


