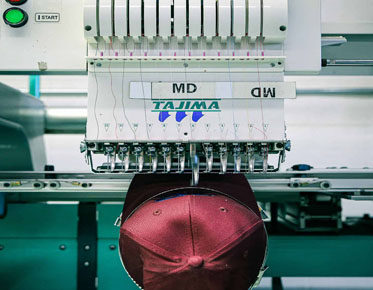
Your Guide to Embroidery Digitizing for Caps
While embroidering a hat, the seam in the middle of many hats is the curse. The embroidery digitizing for caps may bring great challenges to new and experienced embroiderers. Here are some tips for dealing with some of the biggest problems with caps.
Height limit: As a general rule, the
logo programmed for the hat cannot exceed 2.25 inches high. Although this
number is not immutable, it is a good rule of thumb. Some equipment
manufacturers say their sewing yards are as high as three inches. This may be
true, but it is not just the machine that determines how much vertical space is
available for embroidery. The structural characteristics of hats vary with hat
styles; Think about the low crown, six panel non structure and five panel
structure cap. This has not even started to solve the height limit of products
such as sun visors (usually no more than 1.5 inches) or barrel covers.
Depending on the product, all bets are closed. Digitizers should ask the
customer what hat the logo will be worn on and the space available for
embroidery.
In addition, please be aware of
possible mechanical problems and be prepared to provide some insights to the
customer. For example, most hat frames will allow the design to be sewn quite
large. However, when the design reaches the top of the hat (you can see this
happens if you have X-ray vision), the throat plate of the embroidery machine
will contact the inner crown of the hat and cause the hat frame to move. Once
this happens, the game is over. It's not the programmer's fault, but it looks
like it is.
Cap technology: In most cases, the hat
logo should be embroidered from bottom to top and centered as much as possible.
It is difficult to have the same type of stability as flat bottomed clothing,
especially when the hat is not constructed. Because of this, loose fabrics tend
to wrinkle or be squeezed (as shown in the figure above). The programming
center will push the fabric away from the center and provide a batter
opportunity to keep all materials flat.
Perfect bottom-up and central paths
are not always possible. When this happens, it is better to consider the path
that provides the best opportunity for the logo to help keep the material
stable and the stitch helps the fabric lay flat. In the ImplantDirect example
in the figure, the text pushes the fabric outward from the center, leaving a
more stable surface on the left side of the seam to make the logo flat.
Terrible seams: The ubiquitous six panel cover is notorious for the seams in the middle. It leads to two big problems that digitizers and customers must consider. In addition to the correct technique, it is important for the programmer to explain why seams cause so many problems.
In the middle of the joint is the
valley between two high material ridges. This seems obvious, but many people
forget it. If you unfortunately have a lowercase "i" in the middle of
the design, the letter will fall into the valley of the seam and look terrible
unless you plan.
In addition, some hats are made of
huge bottom seams, which will greatly affect the quality of embroidery if not
considered. If there is small text embroidery around the seam, you should ask
to see the hat. This may not seem like much, but when a small letter is up on
one side of the seam and then down, the letter is likely to twist. In the
Hampton logo, you can see how seams affect stitch quality, starting from the
left side of the "M". This is bad programming. The digitizer should
increase the tension compensation and inform the customer that even a slight
increase in the design size will significantly improve the quality.
Hat embroidery is tricky and requires
the highest quality digitization. Each project will come up with its own
solution. Each time you sit down to write a new design, you may feel that you
are reinventing the wheel. Compared with the digitalization of flat shoes, the
digitalization of hats should first know what the logo will be embroidered on.
With this information, you will learn about size limitations, the best
technology to use, and whether you need to handle seams. Try to get a physical
sample of the hat you are digitizing.


