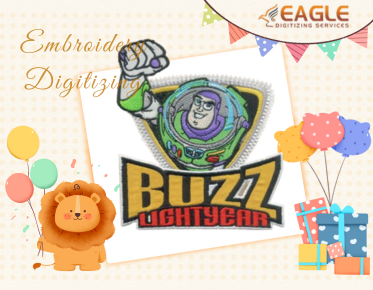
Embroidery Digitizing 101: A Beginner's Guide to Mastering the Craft
Welcome to the World of Embroidery Digitizing
Embroidery digitizing is where art meets technology. It's the
magic that turns an ordinary image into a work of fabric art using digital
tools and techniques. Whether you're a hobbyist looking to explore a new craft
or a business owner wanting to produce high-quality embroidered products,
mastering the intricacies of embroidery digitizing is a valuable skill. But
before you dive in, it's important to understand the foundation of this
creative process and the tools you'll need to make your designs come to life.
What
is Embroidery Digitizing?
At its core, embroidery digitizing is the process of converting
artwork or designs into a file format that an embroidery machine can read. It's
like translating a picture into a language that machines understand—stitches.
This digital file guides the machine's movements, telling it exactly where and
how to stitch the design onto fabric. With the right techniques and tools, you
can create complex patterns, logos, or personalized designs with precision and
flair.
Why
Should You Learn Embroidery Digitizing?
Learning embroidery digitizing offers more than just the ability to
create beautiful designs—it opens doors to creativity, customization, and even
business opportunities. Whether you’re looking to design unique gifts, launch a
custom apparel line, or simply enjoy the satisfaction of turning your artwork
into stitches, mastering this skill empowers you to take full control over your
creative process. Plus, with the right knowledge, you can avoid costly mistakes
and produce professional-quality designs.
The
Magic of Turning Designs into Stitches
Embroidery is an ancient craft, but when fused with technology, it
becomes a whole new realm of possibilities. The process of turning a design into
stitches isn't just technical; it's an art form. You’ll witness the
transformation of your ideas into tangible works of fabric, where every stitch,
every thread, and every design detail has a purpose. With digitizing, you can
adjust, refine, and perfect your design, turning it into a flawless embroidered
masterpiece.
The Basics of Embroidery Digitizing
Embroidery digitizing might seem like a daunting task at first, but
understanding the fundamental processes will make it more accessible. The
journey begins with a digital image, followed by the use of specialized
software to convert it into a format that an embroidery machine can follow.
With a good understanding of the basics, you can start creating designs that
are both visually appealing and technically sound.
Understanding
the Digital Process of Embroidery
The process of embroidery digitizing starts with converting a simple
image file—often a bitmap or vector graphic—into stitch data. The software
assigns specific stitching techniques (like satin stitches or running stitches)
to different parts of the image. This data file is then transferred to the
embroidery machine, which reads the information and replicates the design on
the fabric. The entire process requires a blend of creativity and technical
know-how to ensure the final product matches the intended vision.
Key
Tools You’ll Need: Software and Hardware Essentials
To begin your embroidery digitizing journey, you'll need both software
and hardware. The software is where the magic happens, allowing you to design,
edit, and refine your creations. Some popular embroidery digitizing software
includes programs like Wilcom, Hatch, and CorelDRAW, all of which offer a
variety of tools for creating custom designs. As for hardware, you'll need an embroidery machine capable of reading and stitching
digital files, as well as a computer to run the software.
The
Role of a Digitizer: What Do They Do?
A digitizer’s role is to translate an artist’s vision into a digital
embroidery file. It’s not just about choosing the right stitches or colors—it's
about understanding the properties of fabric, thread, and machine limitations.
A digitizer ensures that every design detail works harmoniously with the
machine's capabilities, from the density of stitches to the order of stitching.
It’s a technical yet creative job, requiring both artistry and precision.
Choosing the Right Software for Beginners
Choosing the right software is crucial, especially for beginners. Some
software is more user-friendly and intuitive, while others offer a more
advanced set of tools for professional use. For beginners, it’s best to start
with simpler, budget-friendly options like Ink/Stitch or SewArt, which can help
you get familiar with the digitizing process without overwhelming you. These
programs provide basic features, such as pre-set stitch types and a simple user
interface, allowing you to focus on the creative aspects of embroidery. As you
gain experience, you can consider upgrading to more complex programs like Hatch
or Wilcom, which offer advanced features, such as multi-needle control and
automatic color sorting, that are essential for professional embroidery projects.
However, starting with simpler software allows you to build foundational skills
and confidence before moving on to more advanced tools.
The
User Interface: Navigating Your First Embroidery Program
Embroidery
software interfaces may seem intimidating at first, but with a bit of practice,
you'll find your way around. Most programs feature an easy-to-use toolbar with
tools for drawing, editing, and transforming designs. The user interface
typically includes features for adjusting stitch types, sizes, and directions,
as well as previewing the design before sending it to the machine. Familiarize
yourself with these basic features to start your journey toward creating
stunning embroidered designs. As you explore the software, you’ll find that
many programs offer helpful tutorials and support forums, allowing you to learn
at your own pace. It’s essential to experiment with different tools and
functions to see what works best for your specific design style. With time,
navigating the interface will become second nature, enabling you to focus more
on the creative process and less on the technicalities.
Understanding
File Formats: PES, DST, and More
Embroidery files come in various formats, each compatible with different embroidery machines. Some of the most common formats include PES, DST, and EXP. PES is widely used by Brother machines, while DST is favored by commercial machines. Understanding these formats will ensure your designs are readable by the machine and result in clean, precise stitches. While each format is designed for specific machine types, some software allows you to convert between formats, making it easier to work with different machines or share files with others. It’s also important to consider file compatibility when designing for commercial production, as different machines and software might require specific file types. By knowing which formats work best for your equipment, you can avoid potential issues and ensure that your designs are correctly rendered and stitched on the fabric.
The Art of Creating Embroidery Designs
How to Convert Images into
Embroidery Files
Converting
images into embroidery files requires both technical know-how and artistic
insight. The first step is to import your image into the embroidery software,
which then converts the image into a series of digital stitches. You’ll need to
manually adjust the design, choosing the right stitches, angles, and densities
to make sure the final result is smooth and professional. This process can
involve simplifying complex images to make them suitable for embroidery, as
some details may be too small or intricate to stitch effectively. Additionally,
color selection is key, as certain colors may blend when stitched on fabric.
With experience, you'll learn how to optimize the design for various materials
and machine settings, ensuring the finished embroidery looks clean and
polished.
The Importance of File
Resolution and Size
File
resolution and size play a significant role in the quality of your final
embroidered design. A low-resolution image may cause pixelation and uneven
stitches, while a high-resolution file ensures crisp lines and details.
Adjusting the size of your design is also important—make sure it fits within
the embroidery hoop size and doesn’t lose its details when resized. Larger
designs require careful consideration of how the stitches will look when scaled
down, as resizing can alter the visual impact of the design. Additionally,
ensure the file’s resolution is high enough to avoid distortion, but not so
high that it leads to unnecessarily large file sizes, which could slow down
processing time. By balancing resolution and size, you’ll achieve a design
that’s both sharp and compatible with your embroidery machine.
Using Vector Art vs. Raster
Images in Embroidery
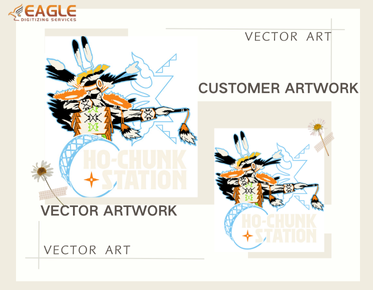
Vector
art is ideal for embroidery digitizing because
it can be scaled infinitely without losing quality. Raster images, on the other
hand, may pixelate when resized. When possible, opt for vector files like SVG or
EPS formats for the best results, as these allow for smoother lines and cleaner
edges in your embroidery designs. Vector files also offer more flexibility when
it comes to editing, as you can easily adjust the size, shape, and positioning
of elements without losing quality. Raster images, although useful in certain
situations, often require more manipulation to work effectively with embroidery
software. By understanding the advantages of vector over raster art, you can
create designs that are easier to work with and will look professional when
stitched onto fabric.
Breaking Down the Stitches
Types of Stitches You’ll Use: Satin, Running, and More
Embroidery
digitizing is all about choosing the right stitch type for each section of your
design. Satin stitches are perfect for filling in areas with smooth, shiny
coverage, while running stitches are great for outlining. Other common stitches
include fill stitches, which cover larger areas, and trapunto stitches, which
create a raised effect. Each stitch has its unique purpose and understanding
when and how to use them will elevate your designs. For example, using satin
stitches for text ensures that letters have a smooth, polished finish, while
running stitches create fine, delicate lines for intricate details. Fill
stitches are ideal for backgrounds and larger areas, providing even coverage
without overwhelming the design. Knowing when to use each stitch type will help
you create more dynamic and professional-looking embroiderydesigns.
Choosing the Right Stitch for
Your Design
Each design element requires a specific stitch for the best outcome.
For instance, fine lines and lettering often look best with running stitches,
while larger areas benefit from satin or fill stitches. When deciding which
stitch to use, consider the design’s size, the fabric type, and the desired
texture. A delicate fabric may require fewer or lighter stitches, while a
heavier fabric may need more robust stitch types to ensure the design stays
intact. Experimenting with different stitches on sample fabrics will help you
see how they behave on various materials and refine your decision-making
process. Additionally, consider the overall visual effect you want to
achieve—some stitches create bold textures, while others offer a more subtle
finish.
How Stitch Density Affects Your
Design
How closely or widely the stitches are spaced is known as stitchdensity. High-density designs can appear bold and solid, while low-density designs give a lighter, more airy effect. Finding the right balance between density and the fabric’s properties is key to achieving a professional-looking design that doesn’t pucker or distort. If the density is too high, the stitches can bunch up, causing the fabric to distort, while low-density stitches might not cover the fabric adequately, leading to an unfinished appearance. A good rule of thumb is to test your design on a sample piece of fabric before committing to the final piece. By adjusting the density to match both the design and fabric, you’ll ensure that your embroidered creations look polished and well-crafted.


