Top Picks: Image Editors for Turning Images into Vectors
In the realm of design,
vector graphics hold a special place, admired for their scalability and
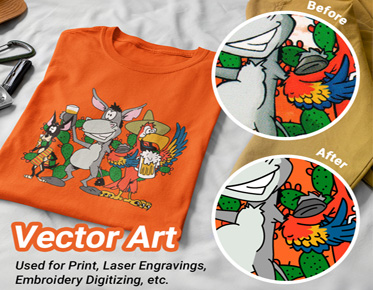
versatility. Unlike raster images, which can become pixelated and lose quality
when enlarged, vector graphics remain crisp and clean at any size. This
characteristic makes them essential for various applications, from intricate
logos to large-scale banners. Designers cherish vectorgraphics not only for their aesthetic appeal but also for their
practical advantages, making them indispensable in a world where visual
communication is paramount.
Why Convert Images to Vectors? The Benefits Explained
Converting images
to vectors opens a treasure trove of benefits. The foremost advantage lies in
the preservation of quality. As mentioned, vectors maintain their sharpness
regardless of size, allowing for seamless integration into various projects.
Furthermore, vectors are easily editable; changing colors, shapes, or sizes is
a breeze without sacrificing fidelity. This flexibility is particularly
beneficial for businesses looking to adapt their branding across different
platforms. Ultimately, vectorization empowers designers to create stunning
visuals that are both practical and impactful.
Key Features to Look for in an Image Editor
User-Friendly
Interface: Making Design Easy for Everyone
A user-friendly
interface is vital in an image editor, especially for those new to design. The
layout should be intuitive, with tools and features easily accessible. A clean
design reduces the learning curve, allowing users to focus on their creativity
rather than struggling with complicated menus. Editors that offer customizable
workspaces also enhance usability, letting designers tailor the environment to
their workflow preferences.
Quality
of Conversion: Preserving Details During Vectorization
Quality of
conversion is perhaps the most critical feature in an image editor focused on
vectorization. The software should maintain the integrity of the original image
while transforming it into a vector format. This
involves preserving details, such as colors, gradients, and textures. Editors
that excel in this area often provide multiple conversion methods, allowing
users to select the one that best suits their specific needs.
Editing
Tools: What Should Your Editor Include?
An effective
image editor should be equipped with a robust suite of editing tools. Essential
features include bezier curve manipulation for creating smooth paths, node
editing for precise adjustments, and layering capabilities to keep designs
organized. Additionally, having options for applying effects and filters can
enhance the creative process, allowing for greater artistic expression. A
comprehensive toolset empowers designers to execute their vision seamlessly.
Top Image Editors for Vectorization
Adobe
Illustrator: The Industry Standard for Vector Graphics
The industry
standard for vector graphics is generally accepted to be Adobe Illustrator.
This powerhouse offers an extensive array of tools designed specifically for
creating and manipulating vector images. With features like the Live Trace
function, users can effortlessly convert raster images into vectors, while its
advanced editing capabilities allow for fine-tuning with precision.
Illustrator’s compatibility with other Adobe products enhances its utility,
making it a favorite among professional designers.
CorelDRAW:
A Robust Alternative with Unique Features
CorelDRAW stands
as a formidable alternative to Adobe Illustrator, boasting its own unique
features. Renowned for its user-friendly interface, CorelDRAW appeals to both
seasoned designers and newcomers alike. The software offers powerful tools for
vectorization, including Smart Fill and PowerTRACE, which simplify the
conversion process while maintaining quality. CorelDRAW also excels in its
versatility, catering to a wide range of design needs from logos to
large-format prints.
Inkscape:
The Open-Source Option for Budding Designers
For those seeking
a free option, Inkscape presents an excellent open-source alternative. While it
may not match the extensive capabilities of its paid counterparts, Inkscape
provides a solid foundation for budding designers. The software includes
essential vectorization tools, along with features for node editing and path
manipulation. Inkscape’s community-driven support and frequent updates make it
a valuable resource for those looking to explore vector graphics without
financial investment.
Comparing Features of Popular Editors
Adobe
Illustrator vs. CorelDRAW: Which Is Right for You?
When comparing
Adobe Illustrator and CorelDRAW, the choice largely depends on personal
preference and specific needs. Illustrator boasts an extensive array of
features and integrations, making it ideal for professionals who require a
comprehensive toolset. CorelDRAW, with its user-friendly design and powerful
features, is perfect for those who appreciate accessibility without sacrificing
quality. Evaluating project requirements and familiarity with the software can
guide your decision.
Inkscape
vs. Paid Options: Is Free Always Better?
While Inkscape
offers a robust free alternative, it’s essential to weigh the benefits against
paid options like Illustrator and CorelDRAW. Inkscape provides a solid entry
point for novice designers and those on a budget. However, paid software often
delivers superior performance, advanced features, and better support.
Ultimately, the choice should be based on individual needs, design aspirations,
and willingness to invest in a professional-grade tool.
Performance
and Speed: How Each Editor Stands Up
Performance and
speed are critical factors to consider when choosing an image editor. Adobe
Illustrator is known for its efficiency and speed, particularly when handling
complex files. CorelDRAW also performs admirably, with quick rendering times
and responsive tools. Inkscape, while effective for most tasks, can experience
slower performance with larger files. Testing each editor under typical working
conditions can provide insight into how they will meet your specific demands.
Step-by-Step Guide to Converting Images to Vectors
Getting
Started: Importing Your Image into the Editor
To convert an
image to a vector, the first step is importing your raster image into the
chosen editor. This process typically involves opening the software and
selecting the import function from the file menu. Choose the desired image from
your computer, ensuring it’s of high quality to yield better results. Once
imported, the image will appear on your workspace, ready for vectorization.
Selecting
the Right Conversion Method: Manual vs. Automatic
Next, it’s time
to decide on a conversion method. Manual tracing involves using tools to
outline the image manually, offering the highest level of control and
precision. This method is ideal for complex images or when specific details are
crucial. Automatic conversion, on the other hand, allows the software to
analyze and convert the image with minimal input from the user. This method is
quicker and often suitable for simpler images but may require post-conversion
adjustments to refine the output.
Tips
for Fine-Tuning Your Vector Output After Conversion
After conversion,
fine-tuning your vector output is essential. Begin by reviewing the paths
created by the software, adjusting nodes and curves for smoothness. Pay
attention to color consistency and gradients; adjusting these can enhance the
overall appearance of your vector. Additionally, consider simplifying
unnecessary points to streamline the file, making it easier to edit and export.
This attention to detail will elevate the quality of your final design.
Exploring Advanced Tools and Techniques
Using
Pen and Bezier Tools for Precise Control
For those seeking
precision in their designs, mastering the pen and bezier tools is essential.
These tools allow designers to create and edit paths with incredible accuracy.
The pen tool facilitates the drawing of custom shapes, while the bezier tool
offers control over curves and angles. Utilizing these tools effectively can
transform a simple vector into a polished work of art, elevating the overall
design.
How
to Adjust Nodes and Paths for Perfect Shapes
Adjusting nodes
and paths is a fundamental skill for any vectordesigner. By selecting individual nodes, you can manipulate their
positions, creating the desired shape or curve. It’s important to maintain a balance
between smoothness and sharpness; too many adjustments can lead to unnatural
forms. Regularly zoom in to ensure accuracy and refine the shapes until they
align with your vision. Mastering this technique is crucial for achieving
professional-quality vector graphics.
Layering
Techniques: Keeping Your Designs Organized
Layering
techniques play a vital role in organizing your designs. By utilizing multiple
layers, you can separate different elements of your composition, making it
easier to edit and manage. This approach also enhances the overall clarity of
your design, as it prevents clutter. Naming layers and using color coding can
further streamline your workflow, ensuring that you can navigate your project
efficiently.
Troubleshooting Common Vectorization Problems
Quality
Loss: What to Do When Your Vectors Don’t Look Right
If quality loss
occurs after conversion, several steps can help rectify the issue. Start by
reviewing the settings used during the conversion process; adjusting parameters
such as detail level and smoothing can improve results. If problems persist,
consider re-tracing complex elements manually to restore clarity. Regular
practice and experimentation with different settings will enhance your
vectorization skills over time.
Color
Issues: Ensuring Consistent Color in Vector Files
Color issues can
plague vector files, often leading to frustration. To ensure consistent color,
utilize color profiles that match across different formats. When converting,
check the color settings in your editor and adjust them to suit your project’s
needs. If discrepancies arise, use tools to sample colors and match them across
layers. Consistency in color not only enhances the aesthetic of your design but
also reinforces brand identity.
Handling
Complex Images: Tips for Difficult Conversions
Complex images
can pose significant challenges during vectorization. When dealing with
intricate designs, break the image down into manageable parts. Consider
simplifying details or using clipping masks to isolate areas for conversion.
Additionally, using a combination of manual and automatic methods can yield
better results. Patience and perseverance are key when navigating the
complexities of intricate vectorization.
Integrating Vector Images into Your Workflow
Exporting
Your Vectors: Choosing the Right File Format
Exporting your
vectors correctly is crucial for their usability. Various file formats serve
different purposes; for instance, SVG and AI formats are excellent for web and
print applications, while PDF files are versatile for sharing and preserving
quality. Be sure to choose a format that aligns with your intended use,
ensuring that your vector graphics retain their integrity during export.
Using
Vectors in Various Applications: From Print to Web
Vectors can be
utilized across a wide range of applications, from print materials to digital
platforms. Their scalability makes them perfect for logos, business cards, and
flyers, while their clean lines and shapes are ideal for web graphics and
animations. Understanding the versatility of vectors allows designers to create
cohesive branding that can be seamlessly adapted to various mediums.
Collaborating
with Others: Sharing Your Vector Files
Collaboration is
a key aspect of design, and sharing vector files should be straightforward.
Ensure that your vector files are saved in widely recognized formats to
facilitate easy sharing with colleagues or clients. Consider using cloud-based
storage solutions for seamless access and collaboration. Providing clear
guidelines on editing permissions can streamline the collaborative process,
allowing for efficient teamwork.
Vector graphics offer unparalleled flexibility and quality, making them an invaluable asset in design. Whether creating logos, illustrations, or marketing materials, understanding and utilizing vectorization can elevate any project. As the design landscape continues to evolve, mastering vectorgraphics will undoubtedly remain a cornerstone of effective visual communication.


