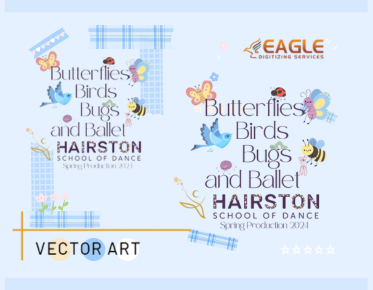
Step-by-Step: Vectorize My iPad Drawings in Adobe Photoshop
Vectorizingyour iPad
drawings can elevate your artwork, making it scalable and versatile for various
projects. Adobe Photoshop offers powerful tools to transform your raster images
into clean, crisp vectors. In this article, we'll guide you through the
step-by-step process of vectorizing your drawings, ensuring your creative
vision shines through in every detail.
Why Vectorize Your Drawings? Benefits of Vector Graphics
Vector graphics
offer a myriad of advantages. The most compelling reason to vectorize your
drawings is the unmatched scalability they provide. No matter how much you
enlarge or reduce them, the lines remain sharp, avoiding the pixelation that
plagues raster images. Additionally, vector files are often smaller in size,
making them easier to store and share. This format is ideal for designers
looking to create logos, illustrations, and complex graphics that require
precision. Vector graphics also allow for easier editing, enabling artists to
adjust colors, shapes, and styles without starting from scratch.
Getting Started with Your iPad Drawings
Choosing
the Right App for Drawing on iPad
To create
stunning drawings on your iPad, selecting the right app is crucial.
Applications like Procreate, Adobe Fresco, and Affinity Designer provide robust
tools for artists. Procreate, with its user-friendly interface and extensive
brush library, is favored for freehand drawing. Adobe Fresco seamlessly
integrates with other Adobe products, making it a solid choice for users
entrenched in the Adobe ecosystem. Affinity Designer offers vector capabilities
alongside raster tools, making it versatile for mixed-media projects. Choose
the app that resonates with your style and workflow.
Essential
Tools for Creating High-Quality Drawings
Equipping
yourself with the right tools can significantly enhance your drawing
experience. Invest in a good stylus, such as the Apple Pencil, which provides
precision and sensitivity for detailed work. Familiarize yourself with the
app’s built-in brushes and customization options to develop your unique style.
Additionally, utilize layers to separate elements of your drawing, making it
easier to edit and adjust different parts of your artwork without affecting the
whole. Understanding the tools at your disposal will enable you to create
high-quality drawings that are ripe for vectorization.
Exporting
Your Drawings: File Formats to Consider
Once your
masterpiece is ready, the next step is exporting it in a format that supports
vectorization. Common file formats include PNG, JPEG, and TIFF for raster
images, while SVG and PDF are excellent choices for vectorgraphics. When exporting, ensure that you select a high-resolution
setting to maintain the integrity of your artwork. If your app allows for
direct export to vector formats, take advantage of that feature. Choosing the
right file format will ensure a smooth transition from your iPad to Adobe
Photoshop.
Transferring Your Drawings to Adobe Photoshop
How
to Import Your iPad Drawings into Photoshop
Transferring your
drawings to Adobe Photoshop is a straightforward process. You can do this via
cloud services like Dropbox or Google Drive, email, or direct USB connection.
Simply upload your exported drawing to the chosen platform, then access it from
your computer. In Photoshop, navigate to File > Open, and select your
drawing. If you’ve chosen a raster format, keep in mind that the vectorization
process will be necessary to convert it into a scalable graphic.
Preparing
Your Canvas: Optimal Settings for Vectorization
Before diving
into vectorization, set up your canvas properly. Open your drawing in Photoshop
and adjust the image size and resolution according to your project’s needs. For
print projects, a resolution of at least 300 DPI (dots per inch) is recommended,
while 72 DPI is typically sufficient for web use. Creating a new layer for your
vector paths ensures that your original artwork remains intact while you work.
Properly preparing your canvas sets the stage for a seamless vectorization
process.
Understanding the Photoshop Environment
Familiarizing
Yourself with the Workspace
Adobe Photoshop
can be daunting at first, but getting acquainted with the workspace will help
streamline your vectorization efforts. Familiarize yourself with key panels,
such as the Layers panel, Tools panel, and Options bar. Knowing where to find
the essential tools—like the Pen Tool, Shape Tool, and Selection tools—will
enhance your efficiency. Customizing your workspace layout to fit your
preferences can also help create a more comfortable and productive environment
for your creative process.
Essential
Tools for Vectorization: The Pen Tool, Shape Tool, and More
The heart of
vectorization lies in a few essential tools. The Pen Tool is your best
friend for creating precise paths and curves, allowing you to trace the
contours of your drawing with accuracy. The Shape Tool provides a way
to create geometric shapes that can serve as building blocks for your design.
Additionally, familiarize yourself with the Direct Selection Tool, which
lets you manipulate anchor points and paths for greater control over your
vector artwork. Mastering these tools is crucial for successful vectorization.
Step-by-Step Guide to Vectorizing in Photoshop
Creating
a New Layer: Best Practices
When starting the
vectorization process, always create a new layer dedicated to your vector
paths. This practice keeps your original drawing safe and allows for easier
adjustments. To create a new layer, navigate to the Layers panel and click the
“New Layer” icon. Naming your layers clearly can also help you stay organized,
especially when working with multiple elements. By keeping your paths on a
separate layer, you maintain a clean workspace and enhance your workflow.
Tracing
Your Drawing with the Pen Tool: Techniques and Tips
Begin tracing
your drawing using the Pen Tool, which allows for precision and flexibility.
Start by placing anchor points along the edges of your design, clicking to
create straight lines, and dragging to create curves. A useful technique is to
zoom in closely while tracing to ensure accuracy. Don’t hesitate to make
adjustments as you go; the beauty of vector art lies in its editability. If you
find a path that isn’t quite right, you can easily adjust anchor points or add
new ones as needed. Patience is key here, as thorough tracing leads to stunning
results.
Using
Paths and Anchors: Mastering Control Points
Once you’ve
traced the primary shapes of your drawing, it's time to refine those paths and
control points. Use the Direct Selection Tool to manipulate
individual anchor points, adjusting their handles to smooth out curves and
refine shapes. Experiment with the Convert Point Tool to change smooth
points into corner points and vice versa, allowing for greater control over
your design. Mastering this technique enhances the overall quality of your
vector image and can dramatically improve the final output.
Enhancing Your Vector Image
Adjusting
Stroke and Fill Colors: Bringing Your Vector to Life
With your paths
traced, it’s time to breathe life into your vector image. Select your paths and
use the Properties panel to adjust stroke and fill colors, choosing
hues that align with your artistic vision. Explore different stroke weights to
find the perfect balance between boldness and subtlety. This step is where your
creativity can truly shine, transforming basic shapes into vibrant artwork.
Adding
Depth with Gradients and Shadows
To elevate your
vector artwork further, consider adding depth with gradients and shadows.
Gradients create a smooth transition between colors, adding dimension and
interest to flat designs. Select the gradient tool and experiment with
different color combinations to see what enhances your image best.
Additionally, employing shadows can ground your elements, providing a sense of
realism. Subtle shadowing effects can transform a flat vector into a
captivating piece of art.
Fine-Tuning
Your Artwork: Using the Transform and Warp Tools
Once your colors
are set, use the Transform and Warp tools to fine-tune your
artwork. The Transform tool allows you to scale, rotate, and skew elements,
helping you achieve the perfect composition. The Warp tool can bend and twist
paths for creative adjustments, enabling you to manipulate shapes in unique
ways. These finishing touches can refine your design, making it polished and
ready for the next steps.
Exporting Your Vectorized Artwork
Choosing
the Right File Format for Your Needs
Once you’re
satisfied with your vector artwork, it’s crucial to export it in the right file
format. For true vector formats, consider saving as an SVG or EPS
file, which maintains the scalability and quality of your design. If you need a
raster version for web use, exporting as a high-resolution PNG or TIFF is
advisable. Always choose a format that aligns with your intended use, ensuring
that your artwork looks its best in every application.
Saving
for Print vs. Web: What You Need to Know
When saving your
artwork, consider the differences between print and web outputs. For print
projects, a resolution of 300 DPI is essential to ensure sharpness and clarity.
On the other hand, web designs can be saved at 72 DPI. Additionally, colors may
appear differently on screens versus in print, so be sure to calibrate your
colors for the intended medium. Understanding these nuances will help you
produce artwork that meets the specific requirements of each platform.
Tips
for Maintaining Quality During Export
To maintain the
integrity of your artwork during export, always double-check your settings.
Avoid resizing your image post-vectorization, as this can lead to quality loss.
Use the Save As function to create a copy of your original file,
preserving your work in its editable state. Before finalizing, review your
artwork at full size to ensure everything looks perfect. These simple steps can
help you safeguard the quality of your vectorized image.
Exploring Advanced Techniques
Using
Layer Masks for Complex Designs
Layer masks are
an advanced technique that can enhance complex vector designs. They allow you
to hide or reveal portions of layers without permanently altering them. By
using layer masks, you can create intricate effects, blending elements
seamlessly for a polished look. This technique is particularly useful for
creating depth and texture in your artwork, allowing for a more dynamic
composition.
Incorporating
Text: Typography in Your Vector Art
Text can add an
exciting dimension to your vector designs. Using the Type Tool, you can easily
incorporate typography that complements your artwork. To discover the ideal
fit, try a variety of fonts, sizes, and styles. Additionally, converting text
to outlines allows you to manipulate letterforms, giving you even more creative
freedom. This fusion of text and imagery can elevate your designs and make them
stand out.
Experimenting
with Patterns and Textures
Patterns and
textures can breathe life into flat vector graphics. Photoshop provides a
variety of built-in patterns, or you can create your own for a unique touch.
Apply patterns to shapes or use them as backgrounds to add depth and visual
interest. Additionally, incorporating textures can create a tactile quality,
enhancing the overall aesthetic of your artwork. Don’t hesitate to
experiment—some of the most striking designs come from playful exploration.
As you dive into the world of vector art, remember that the possibilities are truly limitless. Your unique creations can transcend traditional boundaries, paving the way for innovative designs and projects. Keep pushing your creative boundaries, and watch as your vector artwork transforms into an exciting adventure of artistic expression. Your vector art journey is waiting—let the creativity flow!


.png)
