The Essential Equipment for Embroidery Digitizing
The first step towards producing high-quality embroidery designs is acquiring the right equipment. You'll need a reliable computer and sophisticated embroidery digitizing software that offers various features to help you create intricate designs. Having the proper tools is essential for crafting intricate patterns and professional-quality embroidery projects. Investing in robust embroidery software will enable you to handle complex designs and give you flexibility in editing, stitching, and customization.
Developing Your Skillset for Embroidery Digitizing
Once you have the necessary equipment, it's time to enhance your digitizing skills. Digitizing involves converting a design into a stitch file that an embroidery machine can interpret as various stitch types. The digitizing process is not a simple "one-step, click-the-button" task. It requires expertise and careful planning. A digitizer must analyze each design to determine whether it needs modification to work efficiently as an embroidered piece. Logos or images created for mediums like business cards or websites often need simplification for embroidery, as small details may be lost in the stitching process.
The Role of Design Modification in Embroidery Digitizing
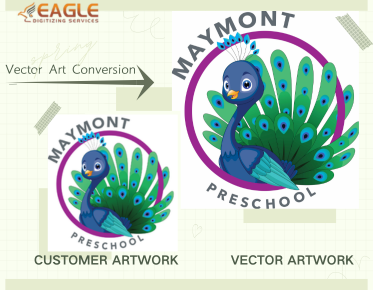
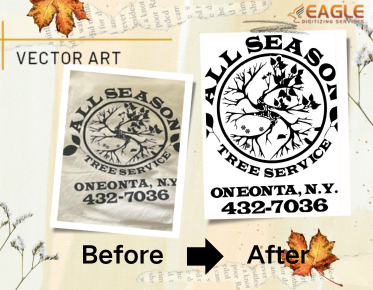
Before digitizing begins, the design is typically altered in a graphics program. This process simplifies complex elements that may not translate well onto fabric. After modifications, the design file is opened in the embroidery software, where it serves as a reference for creating a stitch file. A digitizer ensures that the design is visually and functionally appropriate for embroidery, taking into account the limitations and strengths of the embroidery process.
Pathing: The Foundation of a Successful Embroidery Design
Pathing refers to the sequence in which stitches are created, from start to finish, in an embroidered design. Proper pathing is crucial as it determines how the design will "lie" on the fabric once completed. If the stitches are not sewn in the correct order, it can lead to visible issues such as gaps between fabric sections or uneven text. Pathing impacts the overall aesthetic and structural integrity of the embroidery, making it a critical decision for the digitizer.
Assigning Stitch Types: Choosing the Best Techniques for Each Design
Once the pathing is established, the digitizer must assign stitch types to different sections of the design. The choice of stitches directly affects how well the design will be represented on fabric. The embroidery digitizer first adds underlay stitches, which are not visible in the final design but play a vital role in ensuring the embroidery looks polished. Underlay stitches stabilize the fabric, prevent unwanted gaps, and provide a smooth surface for the remaining stitches.
The Importance of Underlay Stitches in Embroidery
Although underlay stitches are not part of the visible design, they are essential for a clean, professional-looking embroidery. Underlay stitches serve several purposes, including stabilizing the fabric, laying down the nap (the texture of the fabric), and adding density to the design. Without the correct underlay stitches, the design may sink into the fabric, causing issues such as visible fabric showing through the stitching. Properly placed underlay stitches create a solid foundation for the top stitching, ensuring the design remains crisp and vibrant.
Understanding Basic Stitch Types in Embroidery
Embroidery typically involves three basic stitch types: running stitches, satin stitches, and fill stitches. While these are the core stitch types, there are variations within each category. For example, fill stitches are used to cover large areas of fabric, but the digitizer must decide which type of fill stitch to use, the direction of the fill, and where the fill should begin and end within the design. Each of these decisions influences the final outcome of the embroidery and must be carefully considered based on the fabric and design.
Considering Fabric Type in Embroidery Digitizing
Different fabrics interact with stitches in different ways. For instance, stitches tend to sink into soft, textured materials like polar fleece, while they sit on the surface of denser fabrics like nylon. A design that looks great on denim may not look as polished on a pique knit, where the fabric’s texture can distort the design. Therefore, the digitizer must adjust the stitch settings based on the fabric type to ensure that the final product looks its best, regardless of the material.
Managing Push and Pull: A Key Aspect of Embroidery Digitizing
During the embroidery process, designs can shift due to a phenomenon known as "push and pull." This occurs when the fabric moves slightly during stitching, causing distortion in the design. Long stitches, heavy materials, and tightly wound spool threads can exacerbate this issue. To prevent distortion, the digitizer must understand how the stitches will behave on different fabrics and compensate accordingly within the software. Ensuring that the stitches are placed accurately and efficiently will reduce the risk of unwanted movement during the embroidery process.
Advanced Techniques in Stitching: Fill Stitches and Their Variations
Fill stitches are used to cover large areas in a design, but the digitizer must select the correct type of fill stitch to ensure even coverage. The direction, length, and density of the fill stitch all impact the appearance and durability of the embroidery. When digitizing for specific fabrics, such as knitwear or fleece, the digitizer must choose the appropriate stitch density and direction to avoid issues like fabric bunching or sinking stitches. These technical decisions are critical in ensuring the design maintains its integrity on the chosen fabric.
The Importance of Testing Designs Before Final Production
A key part of ensuring high-quality embroidery is testing the design before mass production. Testing allows the digitizer to identify any potential issues, such as gaps in the stitching or unwanted fabric showing through the design. By running a test on a sample fabric, the digitizer can make adjustments as needed, ensuring the final design meets the client’s expectations. This step is essential for delivering consistent and professional results.
Choosing the Right Embroidery Digitizing Service
For those who prefer outsourcing their digitizing work, there are professional embroidery digitizing companies that offer high-quality services at affordable rates. For example, Eagle Digitizing provides digitizing services for a flat rate of $25 for designs up to five inches in size. These companies often offer additional services, such as vector design, free stitch estimates, and free conversions to other embroidery file formats. By choosing a reliable digitizing service, you can ensure that your designs are professionally crafted and tested for accuracy.
Benefits of Professional Digitizing Services
Professional digitizing services offer several advantages, including free editing until the client is fully satisfied, 24-hour turnaround times without rush fees, and a satisfaction guarantee. Many companies also test the digitized designs before sending them to clients, ensuring that the final product is ready for production. These services are ideal for businesses that require consistent, high-quality embroidery designs for branding, marketing, or promotional purposes.
Conclusion
Embroidery digitizing is a complex yet rewarding process that combines technical expertise with creative artistry. From selecting the right equipment and software to mastering stitch types and fabric considerations, digitizing allows for the creation of high-quality embroidered designs that can be used in a variety of applications. Whether you’re creating embroidered logos for a business or personalized gifts for special occasions, the right digitizing techniques will ensure that your designs come to life with precision and style.


