Secrets to Making and Handling Lines with an Embroidery Machine
Lines are the backbone of embroiderydesigns, providing structure, definition, and a sense of flow. Whether
it’s the fine lines in a delicate monogram or
the bold outlines of a graphic logo, lines guide
the eye and shape the overall aesthetic. They are instrumental in creating
patterns, emphasizing details, and giving your embroidery a polished look.
Mastering line work is essential for achieving professional-quality results.
Overview of Common Challenges with Line Work in Embroidery
Working with lines in embroidery can be fraught with challenges.
Issues such as thread breaks, uneven lines, and distortion can detract from the
design’s integrity. Achieving clean, sharp lines requires careful attention to
detail, from machine settings to fabric choices. Understanding these common
pitfalls and learning how to overcome them is key to successful embroidery.
Understanding Your Embroidery Machine
Getting to Know Your Machine: Key
Features for Line Work
Familiarity with your embroidery machine’s features is crucial for
creating crisp lines. Key features to focus on include thread tension controls,
stitch length adjustments, and needle types. Knowing how to navigate these
settings allows you to fine-tune your machine for optimal line work.
Additionally, some machines offer advanced features like adjustable presser
feet and built-in templates that can enhance your line embroidery.
How Different Machines Handle Line
Embroidery
Different embroidery machines handle line work in various ways,
depending on their design and capabilities. High-end models may offer precise
stitch control and advanced options for line embroidery, while more basic
machines might require manual adjustments to achieve similar results. Understanding
how your specific machine handles line work can help you make the necessary
adjustments for better outcomes.
Choosing the Right Machine Settings
for Crisp Lines
To achieve crisp lines, selecting the right machine settings is
essential. Adjust the stitch length to a shorter setting for finer lines and
longer settings for bolder outlines. Ensure the thread tension is balanced—too
tight and the thread may break; too loose and the lines may appear fuzzy.
Regularly test and adjust these settings to find the perfect balance for your
design.
Preparing Your Design
Design Considerations: Why Line
Thickness and Spacing Matter
Line thickness and spacing are fundamental aspects of design
preparation. Thin lines require more precision and can be prone to distortion
if not properly set. On the other hand, thicker lines offer more visibility but
may need additional adjustments to avoid overcrowding. Proper spacing ensures
that lines do not overlap or bleed into one another, maintaining clarity and
readability in the final embroidery.
Using Software to Create and Edit
Line Designs
Embroidery software plays a pivotal role in preparing line designs.
Use software tools to create vector-based line art, which ensures smooth and
precise lines. Many programs offer features for editing line thickness,
spacing, and alignment. Leveraging these tools allows you to fine-tune your
design before transferring it to the embroidery machine.
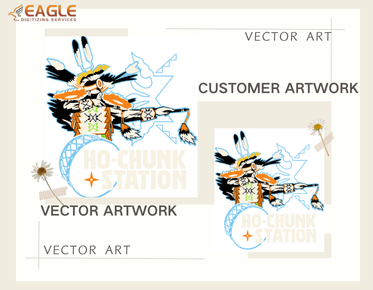
How to Convert Artwork intoEmbroidery Line Art
Converting artwork into embroidery line art involves several steps.
Start by creating or importing your design into vector-based software. Simplify
the design by focusing on the key lines and eliminating unnecessary details.
Export the file in a compatible format, such as DST or PES, that your embroidery
machine can read. Proper conversion ensures that the line work translates
accurately onto the fabric.
Selecting the Right Materials
Fabric Choices: How
Different Fabrics Affect Line Quality
The choice of fabric significantly impacts the quality of line
embroidery. Fabrics with a smooth, stable surface, such as cotton or polyester,
are ideal for clean, sharp lines. Conversely, stretchy or textured fabrics can
cause lines to distort or bleed. Select fabrics that complement the design and
provide a stable base for your embroidery work.
Thread Types:
Best Threads for Clean, Sharp Lines
Thread type plays a crucial role in achieving clean lines. Opt for
high-quality, smooth threads that resist fraying and breakage. Polyester
threads are popular for their durability and vibrant color retention. For
ultra-fine lines, consider using specialty threads designed specifically for
precision work. The right thread will enhance the clarity and sharpness of your
lines.
Stabilizers and Backings: Why
They’re Essential for Line Work
Stabilizers and backings are essential for maintaining the integrity
of line embroidery. Use appropriate stabilizers to prevent fabric distortion
and shifting during stitching. For delicate fabrics, a tear-away or cut-away
stabilizer can provide added support. Ensuring proper backing will help achieve
crisp, well-defined lines and prevent puckering or bunching.
Setting Up Your Machine
Thread Tension: Adjusting for Perfect
Line Work
Thread tension is crucial for achieving perfect line work. Adjust the
tension settings to ensure the thread is neither too tight nor too loose. Proper
tension helps in creating smooth, consistent lines without puckering or thread
breaks. Regularly check and adjust the tension based on the thread type and
fabric used.
Needle Choices: How to Pick the Best
Needle for Your Lines
Selecting the right needle is vital for precise line embroidery. Use
needles with a fine point for delicate lines and a larger eye to accommodate
specialty threads. For thicker lines, a heavier needle might be necessary.
Matching the needle to the fabric and thread ensures that lines are clean and
accurately formed.
Hooping Tips: How to Ensure Your
Fabric Stays in Place
Proper hooping is essential to prevent fabric movement and ensure
accurate line embroidery. Use the correct hoop size and align the fabric
carefully to avoid misalignment. Secure the fabric firmly in place to achieve
consistent, precise lines.
Techniques for Embroidering Lines
Straight Lines: Tips for Perfectly
Straight Stitches
For perfectly straight lines, ensure that your machine’s feed dogs are
properly aligned and that the fabric is straight. Use the grid or guide marks
on your hoop to maintain alignment. Slow and steady stitching helps in
achieving straight lines without wobbling or deviations. Regularly check your
progress to ensure accuracy.
Curved Lines: How to Achieve Smooth,
Continuous Curves
Curved lines require careful handling to ensure smoothness. Use a slow
stitching speed and guide the fabric gently through the machine. Utilize the
machine’s built-in curves or templates to assist with smooth transitions.
Adjust the stitch length and tension to match the curve’s requirements,
ensuring continuous, flowing lines.
Using a Guide or Template: How to
Improve Line Accuracy
Guides and templates can significantly improve line accuracy. Place a
printed template or use software-generated guides to align your design. These
tools help in maintaining consistent line thickness and spacing. For complex
designs, consider using multiple templates or guides to ensure all lines are
precisely executed.
Troubleshooting Common Issues
Overlapping Threads: How to Avoid and
Fix Thread Buildup
Overlapping threads can create unsightly buildup and distortions. To
avoid this, ensure proper thread tension and adjust settings as needed. If
overlapping occurs, stop the machine and remove the excess threads carefully.
Adjust the design or machine settings to prevent recurrence and maintain clean
line work.
Thread Breaking: Causes and Solutions
for Line Work
Thread breaking is a common issue in line embroidery and can be caused
by improper tension, incorrect needle size, or poor-quality thread. Check and
adjust the tension, select the appropriate needle, and use high-quality thread.
Regularly inspect the thread path and machine components to prevent breaks and
ensure smooth stitching.
Line Distortion: How to Address and
Correct Uneven Lines
Line distortion can occur due to fabric movement, incorrect settings,
or machine issues. Address this by ensuring proper hooping, adjusting machine
settings, and selecting the right materials. Re-examine your design and make
necessary adjustments to correct uneven lines. Regular testing and fine-tuning
will help achieve consistent, accurate lines.
AdvancedTechniques for Professional Results
Creating Custom Line Patterns: How to
Design Unique Line Embroidery
Designing custom line patterns involves creating unique designs
tailored to your specific needs. Use vector-based software to create intricate
patterns and adjust line thickness and spacing. Experiment with different
styles and techniques to achieve distinctive, professional results that stand
out.
Using Multi-Needle Machines: Benefits
for Complex Line Work
Multi-needle machines offer significant advantages for complex line
work. They allow for multiple threads to be used simultaneously, reducing the
need for frequent thread changes and improving efficiency. This is particularly
beneficial for designs with varying line colors or thicknesses, providing a
more streamlined embroidery process.
Incorporating Line Work into Larger
Designs: Tips for Integration
Integrating line work into larger designs requires careful planning
and execution. Ensure that the line work complements other elements of the
design and does not overshadow them. Use line work to enhance and define the
overall design, balancing it with other features for a cohesive and visually
appealing result.
Software and Tools for Line Design
Best Embroidery Software for Line
Work
Choosing the right embroidery software is crucial for designing
precise line work. Look for software with robust tools for creating and editing
vector designs, such as Adobe Illustrator or CorelDRAW. Software with features
like automatic tracing and line adjustment tools can streamline the design
process and enhance accuracy.
Creating Vector Files: Why They’re
Essential for Clean Lines
Vector files are essential for clean lines in embroidery designs.
Unlike raster images, vector files maintain sharpness and clarity at any size.
They allow for precise control over line thickness, spacing, and alignment,
ensuring that your designs translate accurately onto fabric.
Exploring Digital Tools: How to Use
Software for Precision
Digital tools offer enhanced precision for line design. Use features
like guides, grids, and snapping to ensure accurate placement and alignment of
lines. Experiment with different tools and settings in your software to achieve
the desired level of detail and clarity in your embroidery designs.
Testing and Quality Control
Sample Stitches: Why Testing is
Crucial for Line Work
Testing with sample stitches is crucial to evaluate the quality of
line work before final production. Run small test samples to check for issues
such as thread breaks, distortion, or alignment problems. This allows you to
make necessary adjustments and ensure that the final product meets your
standards.
Evaluating Results: How to Check for
Line Consistency and Quality
Carefully evaluate the results of your embroidery to ensure line
consistency and quality. Check for uniformity in line thickness, smoothness of
curves, and overall clarity. Use magnification tools to inspect fine details
and make adjustments as needed to achieve a professional finish.
Making Adjustments: How to Refine
Your Design for Better Results
Refining your design involves making adjustments based on test results
and quality evaluations. Tweak line thickness, spacing, and settings to improve
accuracy and appearance. Continuous refinement helps in achieving the best
possible results and ensures that your final embroidery is of the highest
quality.
Perfecting line work is essential for achieving high-quality embroidery. Clean, precise lines enhance the overall design and contribute to a professional finish. Mastering the techniques and tools involved in line embroidery will elevate your skills and result in stunning, polished creations. Embrace the learning journey and apply these insights to achieve excellence in your embroidery projects.


