DIY Machine Embroidery Trend 101: Everything You Need to Know
In recent years, DIY machine embroidery has surged in popularity, sparking a crafting revolution that merges technology with artistic expression. What was once a niche hobby reserved for skilled artisans is now accessible to a broad audience, thanks to advancements in affordable embroidery machines and user-friendly software. This trend has transformed the humble needle and thread into a powerful tool for personalizing everything from home decor to fashion accessories, empowering crafters to infuse their creations with unique, intricate designs. If this post piqued your curiosity and you wish to learn more about Embroidery Digitizing, feel free to reach out to us.
Why DIY Embroidery is Captivating Crafters and Creators
DIY embroidery captivates crafters and creators with its blend of tradition and innovation. The tactile satisfaction of stitching combined with the creative freedom offered by modern technology makes it an irresistible choice for those looking to make a personal statement. Whether it’s customizing a family heirloom, designing one-of-a-kind gifts, or exploring new artistic avenues, DIY machine embroidery allows individuals to bring their creative visions to life in a tangible and meaningful way.
Getting Started with DIY Machine Embroidery
Essential Equipment: What You Need to Begin
Embarking on a DIY machine embroidery journey requires a few essential pieces of equipment. At the heart of your setup is an embroidery machine, which will be your primary tool for creating intricate designs. Additionally, you’ll need a computer or tablet with embroidery software to design and digitize your patterns. A quality iron, a variety of embroidery threads, and a selection of stabilizers are also crucial for achieving professional results. With these basics in place, you’re ready to dive into the world of machine embroidery.
Choosing the Right Machine for DIY Projects
Selecting the right embroidery machine is crucial to your success. Consider features such as stitch quality, hoop sizes, and built-in designs when making your choice. Beginners may benefit from a machine with intuitive controls and a range of automatic settings, while more advanced crafters might opt for machines with extensive customization options. Ensure the machine you choose aligns with your specific needs and the types of projects you plan to undertake.
Basic Supplies: Threads, Fabrics, and Stabilizers
Basic supplies for DIY machine embroidery include threads, fabrics, and stabilizers. Threads come in various materials such as polyester, rayon, and metallic, each offering different finishes and durability. Fabrics suitable for embroidery include cotton, linen, and polyester blends, chosen based on the project’s requirements. Stabilizers, which are used to support the fabric during stitching, help prevent stretching and distortion. Choosing high-quality supplies ensures that your embroidered projects look polished and professional.
Setting Up Your Embroidery Machine
Unboxing and Assembling Your Machine
Unboxing and assembling your embroidery machine is an exciting first step. Carefully follow the manufacturer’s instructions to set up the machine, ensuring all components are correctly assembled and securely in place. Familiarize yourself with the machine’s features, such as the needle, bobbin case, and embroidery hoop, to ensure you’re ready for your first project. A well-set-up machine is essential for achieving the best results and avoiding common issues.
Calibrating and Testing Your Equipment
Calibrating and testing your equipment helps ensure that your embroidery machine operates smoothly. Run a few test stitches on a scrap piece of fabric to check for thread tension, stitch alignment, and overall performance. Adjust the machine parameters as needed to get the desired results. Regular testing and calibration will help prevent problems and improve the quality of your embroidery.
Understanding Machine Settings and Functions
Understanding your machine’s settings and functions is key to mastering embroidery. Familiarize yourself with options such as stitch length, density, and thread tension. Learn how to adjust these settings to suit different fabrics and designs. Knowing how to navigate your machine’s features will enhance your control over the embroidery process and contribute to more successful projects.
Designing Your Own Embroidery Patterns
Creating Custom Designs: Software and Tools
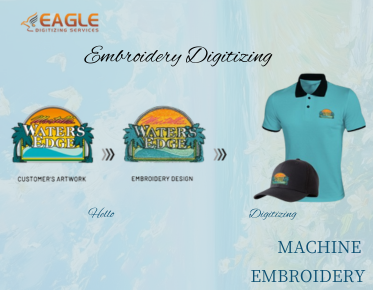
Creating custom embroidery designs involves using specialized software to convert artwork into stitch patterns. Popular programs such as Adobe Illustrator or dedicated embroidery software offer tools for designing, digitizing, and editing patterns. These tools allow you to create intricate, personalized designs that can be transferred to your embroidery machine. Experimenting with different software features will help you develop unique and customized embroidery projects.
Tips for Digitizing Your Artwork
Digitizing artwork for embroidery requires careful attention to detail. Start by scanning or importing your design into embroidery software. Use the software’s tools to define stitch types, densities, and paths. Pay close attention to the design’s complexity and make adjustments to ensure it translates well onto fabric. Digitizing effectively will help achieve a clean, professional look in your finished embroidery.
Working with Pre-Made Patterns: Where to Find Them
If designing from scratch seems daunting, pre-made patterns are a great alternative. Numerous online resources offer a wide range of embroidery patterns, from simple designs to intricate artwork. Websites, embroidery forums, and craft stores often provide downloadable patterns and ready-to-use designs. Using pre-made patterns can save time and offer inspiration, allowing you to focus on perfecting your stitching techniques.
Choosing Fabrics and Threads for DIY Projects
Best Fabrics for Machine Embroidery
Choosing the right fabric is essential for successful machine embroidery. Fabrics such as cotton, polyester, and blends are commonly used due to their durability and ease of stitching. For more delicate designs, consider fabrics like silk or satin. Always test your chosen fabric with a sample design to ensure compatibility and to achieve the best results for your project.
Selecting Threads: Types, Colors, and Finishes
Selecting the appropriate threads can significantly impact the outcome of your embroidery. Polyester threads are known for their strength and colorfastness, while rayon threads offer a shiny finish. Metallic threads add a touch of sparkle but require careful handling to prevent tangling. Choose thread colors that complement your design and fabric, and consider experimenting with different finishes to enhance the visual appeal of your embroidery.
How to Care for Embroidered Fabrics
Proper care of embroidered fabrics ensures their longevity and maintains their appearance. Follow the care instructions specific to your fabric and thread types, typically involving gentle washing and avoiding high heat. To prevent damage, turn embroidered items inside out before washing and use a mild detergent. Iron embroidered fabrics with a low heat setting, placing a cloth between the iron and the embroidery to protect delicate threads.
Embroidery Techniques and Tips
Basic Embroidery Stitches and Their Uses
Mastering basic embroidery stitches is foundational to creating beautiful designs. Common stitches include satin stitch, running stitch, and backstitch, each serving different purposes and adding texture to your work. Understanding how to use these stitches effectively will enhance your ability to execute various designs and techniques in your embroidery projects.
Techniques for Smooth and Even Stitches
Achieving smooth and even stitches requires practice and precision. Ensure your fabric is taut in the hoop to prevent shifting during stitching. Adjust thread tension and machine settings to avoid puckering or uneven stitching. Regularly check your work as you go to address any issues promptly and ensure a consistent, high-quality finish.
Troubleshooting Common Stitching Issues
Common stitching issues include thread breakage, fabric puckering, and design misalignment. To troubleshoot, first check the thread tension and adjust if necessary. Ensure the fabric is properly stabilized and that the machine is correctly threaded. Addressing these issues promptly and making adjustments as needed will help maintain the quality of your embroidery projects.
Caring for Your Embroidered Items
Proper Washing and Maintenance Tips
Proper washing and maintenance are crucial for preserving the beauty of your embroidered items. Follow care instructions specific to the type of fabric and thread used. Gentle washing in cold water and air drying are typically recommended. For items that require ironing, use a low heat setting and protect the embroidery with a pressing cloth.
How to Remove Embroidery from Fabrics
Removing embroidery from fabrics can be challenging and may not always be possible without damaging the fabric. If removal is necessary, carefully cut the threads from the back of the fabric, using a seam ripper or small scissors. Take care to avoid snipping the fabric or leaving visible marks. In some cases, professional cleaning or repair services may be required.
Storing Your Embroidered Pieces to Preserve Quality
Proper storage of embroidered pieces helps preserve their quality over time. Store items in a cool, dry place away from direct sunlight to prevent fading. Use acid-free tissue paper or protective covers to shield embroidered areas from dust and damage. Proper storage ensures that your creations remain in excellent condition for years to come.
Tips for Overcoming Common Challenges
Handling Machine Glitches and Issues
Machine glitches and issues can disrupt your embroidery projects. Regular maintenance and troubleshooting can help address common problems such as thread jams or needle issues. Consult your machine’s manual for specific troubleshooting tips and seek professional repair services if necessary.
Dealing with Fabric Stretch and Distortion
Fabric stretch and distortion can affect the quality of your embroidery. Use appropriate stabilizers and hooping techniques to minimize these issues. Ensure your fabric is properly aligned and supported throughout the embroidery process to achieve a smooth, even result.
Solutions for Common Design and Pattern Problems
Common design and pattern problems include misalignment, thread breaks, and color inconsistencies. Address these issues by adjusting your machine settings, checking thread tension, and ensuring proper digitization of designs. Regularly reviewing and testing your designs will help prevent and resolve these problems.
Maintaining and Upgrading Your Embroidery Machine
Regular Maintenance Tips for Longevity
Regular maintenance is essential for the longevity of your embroidery machine. Clean the machine regularly to remove dust and debris, and check for any signs of wear or damage. Follow the manufacturer’s maintenance schedule and perform routine inspections to ensure optimal performance.
Upgrading Your Equipment and Software
Upgrading your equipment and software can enhance your embroidery capabilities. Consider investing in advanced features or additional accessories that align with your evolving needs. Staying current with software updates ensures you have access to the latest tools and improvements.
When to Seek Professional Repairs
Seek professional repairs when you encounter persistent issues or significant malfunctions with your embroidery machine. Professional technicians can diagnose and address complex problems that may be beyond the scope of DIY troubleshooting. Timely repairs ensure your machine remains in good working condition and continues to produce high-quality results. For the top-notch online custom embroidery digitizing services, don't hesitate to get in touch with us.
Embracing the DIY machine embroidery trend offers a rewarding blend of creativity and technology. This craft allows individuals to personalize their projects, explore artistic possibilities, and even turn their hobby into a business. By experimenting with designs, fabrics, and techniques, crafters can produce unique, meaningful creations that reflect their individual style. The world of DIY embroidery invites everyone to explore their artistic potential and make their mark in the realm of crafting.


