Appliqué Meets Mylar: Stunning Embroidery Creations
Embroidery is more than just needle and thread; it's a canvas for creativity. Appliqué and Mylar are two techniques that add extraordinary flair to embroidery projects, transforming simple fabric into pieces of art. Appliqué involves layering fabric to create patterns and designs, while Mylar, a reflective and versatile material, can enhance these designs with shimmer and dimension. This guide explores how to master both techniques and combine them to create striking, unique embroidery pieces.
Understanding Appliqué in Embroidery
What is Appliqué? A Simple Definition
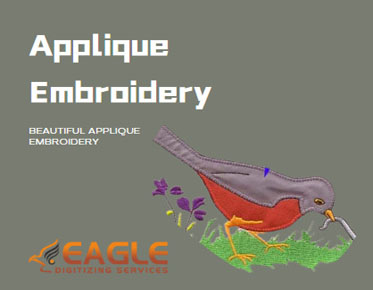
Appliqué is an embroidery technique where pieces of fabric are sewn onto a base fabric to form a design or pattern. The appliqué fabric can be cut into various shapes and sizes, and then attached using stitching techniques that can range from basic to elaborate. This method adds texture and visual interest, making it a popular choice for creating custom designs on clothing, home décor, and accessories.
Types of Appliqué: Basic, Raw Edge, and Satin Stitch
Appliqué comes in several forms, each with its unique characteristics:
● Basic Appliqué: This involves a straightforward technique where fabric shapes are sewn onto a base fabric. The edges are often stitched down with a simple running stitch or a basic zigzag stitch.
● Raw Edge Appliqué: In this technique, the raw edges of the fabric pieces are left unfinished. This creates a more casual, frayed look and is ideal for projects where a relaxed, rustic appearance is desired.
● Satin Stitch Appliqué: This method uses dense, closely spaced stitches to encase the edges of the appliqué fabric. The result is a smooth, polished edge that provides a clean, professional finish.
Step-by-Step Guide to Basic Appliqué
Designing Your Appliqué Pattern: From Sketch to Fabric
Begin by sketching your design on paper. Once satisfied, transfer the pattern to your appliqué fabric using a fabric marker or pencil. Cut out the shapes carefully, ensuring precision for a clean finish.
Preparing the Fabric: Cutting, Positioning, and Securing
Cut the base fabric to your desired size and shape. Place the appliqué shapes onto the base fabric, using a fusible web to adhere them temporarily. Make sure the pieces are aligned and secure before you begin sewing.
Sewing Techniques: Machine vs. Hand Appliqué
● Machine Appliqué: Using a sewing machine can speed up the process. Set your machine to a zigzag or satin stitch to secure the appliqué fabric to the base. Machine appliqué is efficient for larger projects and offers a consistent finish.
● Hand Appliqué: For a more detailed and personalized touch, hand appliqué involves stitching around the edges of the appliqué pieces by hand. This technique can be time-consuming but provides a delicate, artisanal look.
Advanced Appliqué Techniques
Reverse Appliqué: Creating Depth and Texture
Reverse appliqué involves layering fabrics in reverse order. Instead of adding fabric pieces on top, you cut away parts of the top layer to reveal a contrasting fabric underneath. This technique creates depth and a striking, multi-dimensional effect.
Multi-layer Appliqué: Adding Dimension and Interest
Multi-layer appliqué adds complexity by layering multiple pieces of fabric to create intricate designs. Each layer can be a different color or pattern, adding richness and depth to the final piece. This technique is excellent for creating vibrant, eye-catching designs.
Combining Appliqué with Other Embroidery Techniques: Mixing It Up
Experiment with combining appliqué with other embroidery techniques such as embroidery stitches, beading, or even fabric painting. This approach can enhance your design and add unique textures and effects.
What is Mylar in Embroidery?
Introduction to Mylar: Properties and Uses
Mylar is a type of polyester film known for its reflective and shiny properties. It is used in embroidery to add a distinctive sparkle and dimension to designs. Mylar can be applied in various ways to create dramatic effects and enhance the visual appeal of embroidery projects.
The Benefits of Using Mylar in Embroidery Projects
Mylar enhances embroidery projects by adding:
● Shine: The reflective nature of Mylar brings a unique shimmer to designs, making them stand out.
● Dimension: Mylar adds a three-dimensional quality, creating a sense of depth and texture.
● Durability: Mylar is durable and can withstand multiple washes, making it suitable for everyday items.
Types of Mylar Sheets and Films: Choosing the Right One
Mylar comes in various forms, including:
● Sheets: Flat Mylar sheets are easy to cut and apply, ideal for adding accents to the fabric.
● Films: Mylar films can be used for larger areas or intricate details. Choose the thickness and finish based on your project needs.
How Mylar Enhances Appliqué Designs
Adding Shine and Dimension: How Mylar Transforms Appliqué
Integrating Mylar into appliqué designs introduces a striking visual effect. The reflective quality of Mylar catches light and adds a luminous sheen, transforming ordinary designs into eye-catching pieces.
Creating Textured Effects: Using Mylar to Add Depth
Mylar can be layered or used as a backing to create textured effects in appliqué. Experiment with different Mylar placements and techniques to achieve varied textures and add interest to your designs.
Mylar as a Background Element: Creating Contrast and Interest
Using Mylar as a background element enhances the contrast between your appliqué and the base fabric. It can make the appliqué pieces pop and add an element of surprise to your designs.
Incorporating Mylar into Your Embroidery Projects
Designing with Mylar: Tips for Successful Integration
When incorporating Mylar into your designs, consider:
● Placement: Decide where Mylar will have the most impact, whether as a highlight or background.
● Compatibility: Ensure that Mylar and other materials in your design work well together and complement each other.
● Testing: Before committing to your final project, test Mylar on a sample piece to see how it interacts with other materials and threads.
Preparing Mylar for Use: Cutting and Handling
Cut Mylar with precision using sharp scissors or a rotary cutter. Handle it carefully to avoid creases and wrinkles. Use a stabilizer or adhesive to secure Mylar in place during stitching.
Sewing Techniques for Mylar-Enhanced Appliqué: Machine Settings and Tips
When sewing with Mylar:
● Machine Settings: Adjust your machine settings for optimal performance with Mylar. Use a fine needle and adjust the stitch length and tension as needed.
● Tips: Sew slowly and carefully to avoid shifting or puckering. Use a tear-away stabilizer to support the Mylar during stitching. If this post piqued your curiosity and you wish to learn more about Embroidery Digitizing, feel free to reach out to us.
Combining Appliqué and Mylar: A Creative Approach
Layering Techniques: How to Combine Appliqué and Mylar Effectively
Combine appliqué and Mylar by layering the two techniques. Start with your base fabric and appliqué, then add Mylar accents or backgrounds. Experiment with different layering arrangements to achieve the desired effect.
Creating Mixed Media Designs: Integrating Fabric, Thread, and Mylar
Mixed media designs allow you to combine fabric, thread, and Mylar in creative ways. Use different textures and materials to add complexity and visual interest to your projects.
Examples of Stunning Appliqué and Mylar Creations: Inspiration Gallery
Explore examples of successful appliqué and Mylar designs for inspiration. From shimmering quilts to eye-catching apparel, these creations showcase the endless possibilities of combining these techniques.
Troubleshooting Common Issues
Addressing Fabric Shifting and Fraying: Tips for a Smooth Finish
To prevent fabric shifting and fraying:
● Stabilize: Use stabilizers to support the fabric during stitching.
● Press: Press fabric before and after sewing to smooth out any wrinkles or distortions.
● Trim: Trim any frayed edges carefully to maintain a clean finish.
Managing Mylar Wrinkles and Bubbles: Ensuring a Flat and Smooth Application
To handle Mylar wrinkles and bubbles:
● Smooth: Use a pressing cloth and iron on a low setting to smooth out wrinkles.
● Adhesive: Apply a thin layer of adhesive to keep Mylar flat during sewing.
● Careful Handling: Handle Mylar gently to avoid creases and bubbles.
Dealing with Thread and Needle Problems: Finding the Right Combination
For thread and needle issues:
● Needle Choice: Use a needle suitable for both Mylar and fabric, such as a sharp or universal needle.
● Thread Type: Choose threads that complement your materials and avoid thread breakage or puckering.
Care and Maintenance of Appliqué and Mylar Projects
Washing and Cleaning Tips: Preserving the Integrity of Your Designs
Wash embroidered items with care:
● Gentle Cycle: Use a gentle cycle on your washing machine to avoid damaging the embroidery.
● Cold Water: Wash in cold water to prevent color fading and fabric shrinkage.
● Air Dry: Air dry your items to maintain their shape and prevent damage.
Storing Embroidered Items: Preventing Damage and Wear
Store embroidered items properly:
● Avoid Sunlight: Keep items out of direct sunlight to prevent fading.
● Use Storage Bags: Store items in breathable fabric bags to protect them from dust and dirt.
● Flat Storage: Store items flat or on padded hangers to avoid distortion.
Repairing Appliqué and Mylar Projects: Simple Fixes for Common Issues
To repair appliqué and Mylar projects:
● Reapply: Use fabric adhesive to reattach any loose appliqué pieces.
● Stitch: Reinforce stitching on damaged areas to restore the design.
● Replace Mylar: If Mylar is damaged, carefully replace it with a new piece.
Creative Applications of Appliqué and Mylar
Home Décor: Pillows, Quilts, and Wall Art
Appliqué and Mylar can transform home décor items. Create custom pillows with vibrant designs, quilts with shimmering accents, or wall art with dynamic patterns. These techniques add a unique touch to home interiors.
Fashion and Accessories: Customizing Clothing and Bags
Incorporate appliqué and Mylar into fashion and accessories. Customize clothing with eye-catching designs, add flair to bags with reflective accents, and create personalized accessories that stand out.
Gifts and Keepsakes: Personalized Embroidered Creations
Appliqué and Mylar make for memorable gifts and keepsakes. Design personalized items such as monogrammed towels, embellished photo frames, or unique ornaments to give a special touch to your gifts.
The fusion of appliqué and Mylar in embroidery opens up a world of creative possibilities. By mastering these techniques, you can create designs that are not only visually stunning but also uniquely personal. Embrace the art of appliqué and Mylar to enhance your embroidery projects and explore new dimensions in textile design. Let your creativity shine through and make each piece a masterpiece of craftsmanship.


