How Does Converting to Vector Magic Transform Your Design?
In the digital age, where visual content reigns supreme, having a versatile and scalable logo is non-negotiable. Imagine having a logo that looks sharp on a billboard as well as on a business card—sounds like a dream, right? Well, that’s exactly what converting your logos tovector format can achieve. Let’s dive into the world of vector images and unravel why they are essential for modern branding.
What
is a Vector Image?
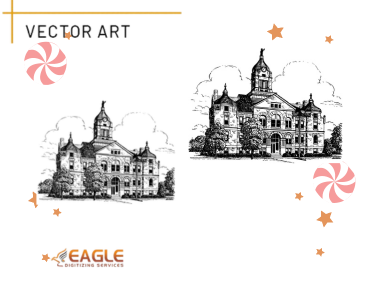
A vector image is essentially a graphic that uses mathematical equations to define shapes, lines, and colors. Unlike raster images, which are composed of pixels, vectors are defined by paths, which can be scaled infinitely without losing quality. This means whether your logo is displayed on a tiny screen or a massive banner, it remains crisp and clear.
Vector
vs. Raster: What's the Difference?
The primary difference between vector and raster images lies in their construction. Raster images are pixel-based, meaning they can become pixelated when enlarged. Think of a raster image as a mosaic: made up of many small pieces. On the other hand, vector images are like a detailed blueprint, scalable to any size without loss of clarity. This inherent scalability makes vectors the go-to choice for logos and other graphics that require flexibility.
Why
Convert Logos to Vector Format?
Benefits of Vector Logos
Converting logos to vector format offers numerous advantages. Firstly,
vectors ensure your logo looks professional at any size. Need to print your
logo on a massive banner or shrink it for a mobile app icon? No problem.
Vectors maintain the integrity of your design. Secondly, they’re easier to
edit. You can adjust colors, shapes, and details effortlessly, allowing for
quick tweaks and updates.
Common Uses for Vector Logos
Vector logos are indispensable in various applications. They are perfect for printing, as they eliminate issues with resolution and scaling. They’re also ideal for web use, ensuring your logo looks sharp on high-resolution screens. Additionally, vectors are crucial for branding materials—think business cards, letterheads, and merchandise. Their adaptability makes them a versatile asset for any brand.
Understanding
Different Vector File Formats
AI: Adobe Illustrator
The AI format, native to Adobe Illustrator, is a powerhouse for
creating and editing vector graphics. It supports layers and advanced features,
making it ideal for complex designs.
EPS: Encapsulated PostScript
EPS files are widely used in professional settings. They can include
both vector and raster elements, making them versatile. EPS is great for
transferring artwork between different graphic design programs.
SVG: Scalable Vector Graphics
SVG is a web-friendly format that’s perfect for logos and icons. It’s
supported by most web browsers, ensuring your vector images look great online.
PDF: Portable Document Format
PDFs can contain both vector and raster graphics. They’re highly versatile and widely used for sharing designs because they preserve the original quality of the artwork.
Choosing
the Right Software for Vector Conversion
Adobe Illustrator
Adobe Illustrator is the supreme benchmark in vector graphics. Its
robust toolset allows for precise control over every aspect of your design.
While it comes with a learning curve, its capabilities are unmatched.
CorelDRAW
CorelDRAW is another powerful option for vector graphics. It’s
user-friendly and packed with features, making it a favorite among
professionals and hobbyists alike.
Inkscape: The Free Alternative
Inkscape is a fantastic free alternative to Illustrator. While it may
lack some advanced features, it’s more than capable of handling most vector
conversion tasks.
Online Tools: Quick and Easy
Options
For those who need a quick solution, online tools like Vector Magic or Conversion offer fast and easy vector conversions. These tools are perfect for simple conversions without the need for specialized software.
Preparing
Your Logo for Conversion
Cleaning Up Your Raster Image
Before converting your logo, ensure it’s clean and free of noise.
Remove any unwanted elements and make sure the lines are sharp.
High-Resolution Matters: Why and
How
A high-resolution image provides a better base for conversion. The
more detail in your raster image, the better the vector conversion will be. Aim
for at least 300 DPI.
Simplifying the Design: Less is
More
Simpler designs convert more accurately. Streamline your logo by reducing unnecessary details. Focus on clean lines and clear shapes.
Step-by-Step
Guide to Converting Logos in Adobe Illustrator
Importing Your Logo
Start by importing your raster logo into Illustrator. Go to File >
Place, and select your image.
Using the Image Trace Tool
Select your image and open the Image Trace panel. Choose a preset that
suits your design, like “High Fidelity Photo” for detailed images or “Black and
White Logo” for simpler ones.
Tweaking the Tracing Settings
Adjust the tracing settings to refine the conversion. Play with the
Threshold, Paths, Corners, and Noise sliders until you’re satisfied with the
result.
Expanding and Cleaning Up Your
Vector
After tracing, click “Expand” to convert the traced image into vector paths. Clean up any stray points or unnecessary elements for a polished final product.
Converting
Logos with CorelDRAW
Importing and Setting Up
Open CorelDRAW and import your logo. Make sure your workspace is set
up for vector editing.
Tracing the Bitmap
Use the PowerTRACE tool to convert your bitmap image to a vector.
Choose a suitable preset and adjust the settings as needed.
Adjusting the Vector Paths
Refine the vector paths to match your original design. Tweak the nodes
and curves for precision.
Finalizing and Saving Your
Vector
Once satisfied, finalize your design and save it in your preferred vector format. CorelDRAW supports AI, EPS, SVG, and more.
Using
Inkscape for Vector Conversion
Opening Your Logo File
Start Inkscape and open your raster logo file. Inkscape supports
various formats, including PNG and JPG.
Tracing Bitmap with Inkscape
Select your image and use the “Trace Bitmap” tool. Choose a mode that
fits your design, such as “Brightness Cutoff” or “Edge Detection.”
Refining Your Vector Paths
Fine-tune the traced paths. Adjust nodes and curves to ensure your
vector matches the original design closely.
Exporting the Final Vector Image
Export your finished vector by going to File > Save As, and choose a vector format like SVG or EPS.
Online
Tools for Quick Vector Conversion
Best Online Tools Available
Popular online tools include Vector Magic, Conversion, and
Online-Convert. These platforms offer user-friendly interfaces for quick
conversions.
Pros and Cons of Using Online
Converters
Online tools are convenient and easy to use, but they may lack the
precision and customization options of dedicated software. They’re best for
simple conversions.
Step-by-Step Guide Using a
Popular Online Tool
Upload your image to the tool. Follow the on-screen instructions to trace and convert your logo. Download the vector file once the process is complete.
Manual
Vector Tracing: When and How to Do It
Benefits of Manual Tracing
Manual tracing offers unparalleled precision. It’s ideal for complex
designs where automated tools may fall short.
Tools You’ll Need
You’ll need a graphics tablet, vector editing software, and a steady
hand. Patience is also a key ingredient.
Techniques for Accurate Tracing
Start by outlining the main shapes. Use smooth, continuous lines and
adjust the curves meticulously. Fill in details gradually.
Cleaning Up Your Hand-Drawn
Vectors
After tracing, clean up your paths. Remove unnecessary points and ensure lines are smooth and clean.
Common
Pitfalls in Vector Conversion
Overcomplicating the Design
Keep it simple. Too many details can complicate the conversion process
and lead to a cluttered design.
Ignoring Resolution and Quality
Starting with a low-resolution image can result in a poor vector
conversion. Always use high-resolution images.
Misunderstanding File Formats
Each vector format has its strengths. Choose the right format for your needs, whether it’s AI for complex edits or SVG for web use.
Tips
for Maintaining Quality in Your Vector Logos
Keeping it Simple and Clean
Simplicity is key. A clean, straightforward design ensures your logo
looks great in any context.
Ensuring Scalability
Vectors should be scalable without losing quality. Avoid intricate details
that might not scale well.
Preserving Detail and Accuracy
Pay attention to detail. Ensure that the vector closely matches your original design, preserving its integrity.
Using
Vectors in Various Applications
Print Media: Crisp and Clear
Vectors shine in print media. They ensure your logo looks sharp on
everything from business cards to banners.
Digital Platforms: Versatile and
Adaptable
On digital platforms, vectors adapt seamlessly to different screen
sizes and resolutions. They’re perfect for websites and apps.
Branding Materials: Consistent
and Professional
Consistency is crucial for branding. Vectors ensure your logo maintains its quality across all branding materials.
Troubleshooting
Vector Conversion Issues
Dealing with Jagged Edges
Jagged edges can be smoothed out by adjusting the paths and nodes. Use
software tools to refine the edges.
Fixing Color Issues
Ensure color accuracy by checking color profiles and adjusting fills.
Consistent color is vital for brand identity.
Adjusting Paths and Shapes
Fine-tune your paths and shapes to match the original design. Small adjustments can make a big difference.
Advanced
Techniques in Vector Conversion
Using Layers for Complex Designs
Layers can help manage complex designs. Organize different elements
into layers for easier editing and refinement.
Gradient and Color Blends
Gradients add depth to your design. Use gradient tools to create
smooth color transitions and blends.
Adding Depth and Shadows
Shadows and highlights can add a 3D effect. Use vector tools to create realistic depth and dimension.
Outsourcing
Vector Conversion: What to Look For
Finding a Professional Service
Look for services with good reviews and a solid portfolio. Quality and
reliability are key.
Evaluating Quality and Cost
Balance cost and quality. Cheaper isn’t always better—ensure the
service delivers high-quality vectors.
Communicating Your Needs
Effectively
Clearly communicate your design requirements. Provide detailed instructions and reference images to ensure the best results.
DIY
vs. Professional Vector Conversion
Pros and Cons of DIY
DIY conversion gives you control but requires time and skill. It’s
cost-effective if you’re proficient with vector software.
When to Hire a Pro
Hire a professional for complex designs or when time is limited. Pros
can ensure high-quality results.
Cost-Benefit Analysis
Consider the time and effort of DIY versus the cost of hiring a professional. Sometimes, outsourcing is worth the investment.
Maintaining
Your Vector Files
Organizing Your File Library
Keep your vector files organized. Use clear folder structures and
consistent naming conventions.
Best Practices for File Naming
Name files descriptively and consistently. Include version numbers and
dates for easy reference.
Keeping Backup Copies
Always back up your vector files. Use cloud storage or external drives to safeguard your work.
Converting your logos into vectors is a game-changer
for your brand. It ensures your logo looks professional and versatile across
all platforms and media. Whether you tackle it yourself or hire a professional,
the effort is worth it. Embrace the power of vectors and see your brand’s
visual identity soar.


