Creative Lettering Effects: Mastering Techniques for Stylish Embroidery Fonts
Embroidery is not just about stitches; it's a canvas for creative expression, and one of the key elements in this artistic journey is lettering. Typography in embroidery can transform a design, giving it character, style, and a unique identity. We'll explore the art of creative lettering effects in embroidery fonts, unveiling techniques that elevate your designs from mere words to stylish and captivating statements.
1. Choosing the Right Font for
Your Design
Understanding
Font Styles:
●
Serif vs. Sans Serif: Begin by understanding
the basic distinctions between serif and sans-serif fonts. Serif fonts have
decorative strokes, or serifs, at the ends of letters, conveying a more
traditional and elegant feel. Sans-serif fonts, on the other hand, are clean
and modern, often conveying a sense of simplicity and clarity.
Consider
the Design Theme:
●
Matching Fonts to Themes: Tailor your font
choice to the overall theme of your design. Playful and whimsical fonts work
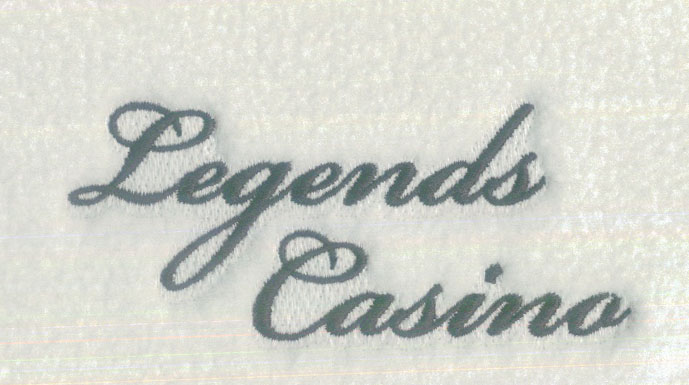
well for children's designs, while elegant scripts may be more fitting for
formal or sophisticated projects.
Legibility
Matters:
● Balancing Style and Readability: While exploring creative fonts, ensure that the chosen font remains legible. A balance between style and readability is crucial to convey your message effectively.
2. Outlining and Filling
Techniques
Outlining
for Emphasis:
●
Bold Outlines: Experiment with bold outlines
to add emphasis to your letters. This technique can create a striking contrast,
making your embroidered words stand out. Choose
a thread color that complements or contrasts with the fabric for maximum
impact.
Filling
with Patterns:
●
Patterned Fill Stitches: Inject personality
into your letters by filling them with creative stitch patterns. Cross-hatch,
herringbone, or even floral patterns can add texture and visual interest. This
technique is particularly effective for larger letters.
Gradient
Fills:
● Color Gradation: Use gradient fills to create a dynamic and eye-catching effect. Transition from one color to another within the letters, adding depth and dimension. Gradient fills work well for words with a sense of movement or energy.
3. Embellishments and Decorative
Elements
Flourishes
and Swirls:
●
Elegant Accents: Incorporate decorative
flourishes or swirls to add a touch of elegance to your lettering. These
embellishments work well with script fonts, enhancing their fluidity and grace.
Shadow
Effects:
●
Drop Shadows: Create a sense of depth by
adding drop shadows to your letters. This simple technique lifts the letters
off the fabric, giving them a three-dimensional quality. Experiment with shadow
direction and intensity for varied effects.
Beads
and Sequins:
● Textured Accents: Elevate your lettering by adding small beads or sequins. This technique works particularly well for special occasions or designs where a touch of glamour is desired. Secure these embellishments carefully to ensure durability.
4. Stitch Direction and Texture
Directional
Stitching:
●
Varied Stitch Directions: Experiment with
stitch directions to create texture within the letters. Diagonal stitches,
cross-hatching, or even circular patterns can add visual interest. Varying
stitch directions can also enhance the contour of each letter.
Satin
Stitching:
●
Smooth Satin Stitches: Satin stitches are
excellent for achieving a smooth, glossy finish. Use satin stitches for larger
lettering or bold statements. Adjust the stitch length and tension to achieve
the desired sheen and texture.
Layering
for Depth:
● Layered Effects: Layering stitches of different colors or textures can create a sense of depth in your lettering. This technique is effective for designs where you want to convey richness and complexity.
5. Mixed Media Embroidery
Incorporating
Fabric and Thread Types:
●
Mixed Textures: Combine different fabric types
and thread materials to introduce a variety of textures. For example, pair a
smooth satin stitch with a textured cotton fabric to create a tactile and
visually appealing result.
Ribbon
and Lace Accents:
●
Elevated Elegance: Integrate ribbons or lace
into your lettering for a touch of luxury. This technique is especially
effective for monogram designs or projects with a romantic or vintage theme.
Fabric
Appliqué Letters:
●
Layered Fabric Letters: Experiment with fabric
appliqué to create letters with depth and substance. Use contrasting or
complementary fabrics to make your letters pop.
6. Monogram Magic
Personalized
Monograms:
●
Tailoring Monograms: Monograms are a classic
application of embroidery fonts. Personalize
your monograms by experimenting with different fonts, styles, and
embellishments. Consider incorporating meaningful symbols or motifs.
Combining
Initials:
●
Interlocking Letters: Create visually engaging
monograms by interlocking or overlapping initials. This technique adds a sense
of unity and cohesion to the design.
Frame
Your Monogram:
● Decorative Frames: Enhance the elegance of your monogram by framing it with decorative elements. Floral motifs, geometric patterns, or ornate borders can transform a simple monogram into a work of art.
Conclusion: Unleashing Creativity
with Embroidery Fonts
Embroidery fonts provide
an exciting platform for creative expression, and mastering various techniques
allows you to elevate your designs to new heights. Whether you're crafting a
playful message or an elegant monogram, the key lies in experimenting with
different styles, textures, and embellishments.
As you embark on
your journey of creative lettering effects in embroidery, remember that each
stitch tells a story. Let your designs speak volumes by infusing them with the
artistry of stylish embroidery fonts. Happy stitching!


