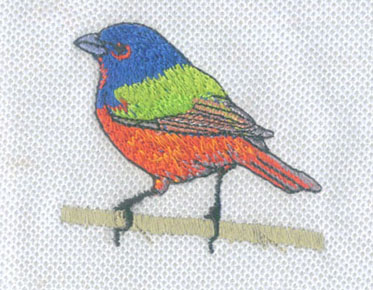
Crafting Identity: Digitizing Patches - From Concept to Application
Embroidered patches have long been a powerful means of self-expression, brand representation, and storytelling. In the digital age, the process of bringing these intricate patches to life has evolved through digitization. From conceptualizing a design to the final application, digitizing patches involves a seamless blend of artistry and technology. In this blog, we'll embark on a journey through the fascinating world of digitizing patches, exploring the steps from concept to application and uncovering the art and precision behind this craft.
1. Conceptualizing the Design
Defining
Purpose and Message:
Before diving into digitization,
clearly define the purpose and message of your patch. Whether it's a brand
logo, a personal emblem, or a symbol of identity, understanding the intended
narrative informs the design process.
Sketching and Ideation:
Begin the design journey with sketches and
ideation. Capture your ideas on paper, experimenting with shapes, colors, and
details. Consider the size of the patch and how it will be displayed. Sketching
provides a tangible starting point for translating your vision into a digital
format.
Considering Size and Detail:
Factor in the size of the patch and the level of detail you want to achieve. Small patches may require simplified designs to ensure clarity, while larger patches offer more room for intricate details. Striking a balance ensures a visually appealing and recognizable result.
2. Digitizing the Design
Choosing
Digitization Software:
Select a digitization software that aligns
with your design needs. Software like Wilcom, Pulse, or Hatch Embroidery
Software offers features for converting your design into a digital embroidery file. Familiarize yourself with the
tools and functionalities to streamline the digitization process.
Converting to Vector Format:
If your design starts as a hand-drawn sketch
or in a raster format, convert it to vector format before digitization. Vector
files maintain the integrity of shapes and lines, ensuring a cleaner transition
to embroidery.
Setting Stitch Types and Directions:
Each element of your patch design requires
careful consideration of stitch types and directions. Satin stitches, fill
stitches, and running stitches are among the common types used in patch
digitization. Choose stitches that enhance the visual appeal and texture of
your design.
Adjusting Density and Underlay:
Fine-tune the stitch density and underlay to achieve the desired texture and stability in your patch. Proper adjustments prevent overly dense stitching, which can affect the flexibility and overall quality of the finished patch.
3. Testing and Refining
Embroidery
Machine Test Runs:
Before finalizing the design, conduct test
runs on your embroidery machine. Testing helps identify potential issues such
as thread tension, density problems, or puckering. Make necessary adjustments
based on the test results to ensure a flawless execution.
Refining Based on Test Feedback:
Analyze the test results and gather feedback on the embroidered samples. Refine the design as needed, addressing any issues that arose during testing. This iterative process ensures that the final patch meets your quality standards.
4. Choosing Materials and Colors
Selecting
Patch Base Material:
Consider the intended use of your patch when
selecting the base material. Common options include twill, canvas, or felt. The
choice of material influences the overall aesthetic and durability of the
patch.
Color Selection:
Choose thread colors that accurately represent
your design. Consider the visibility of colors against the patch background and
ensure that the chosen palette aligns with the intended message. Vibrant and
contrasting colors can enhance the visual impact of your patch.
Exploring Specialty Threads:
To add depth and texture to your patch, explore specialty threads such as metallic or variegated threads. Incorporating these threads into specific elements of your design can elevate the overall aesthetic.
5. Production and Quality Control
Mass
Production Considerations:
Once satisfied with the digitized design, move into mass production. Consider factors such
as batch size, delivery timelines, and production costs. Many embroidery houses
offer bulk production services, ensuring consistency across multiple patches.
Quality Control Checks:
Implement stringent quality control measures during production. Inspect each patch for consistent stitching, color accuracy, and overall quality. Address any deviations promptly to maintain the integrity of the entire batch.
6. Application Techniques
Sewing
Patches on Garments:
Traditional patch application involves sewing
the patch onto garments or accessories. Choose a suitable location and method
for attachment, whether by hand or using a sewing machine. This classic
approach offers a secure and permanent way to display your patches.
Iron-On Application:
Iron-on patches provide a convenient and quick
application method. Ensure your patches are designed with heat-activated
adhesive backing. Follow the instructions for ironing on the patches, providing
a versatile option for temporary or DIY applications.
Velcro or Adhesive Backing:
For patches that may need to be interchangeable, consider Velcro backing or adhesive backing. Velcro allows patches to be easily attached and detached, ideal for military or tactical applications. Adhesive backing provides a temporary option for events or promotional purposes.
7. Promoting and Showcasing
Building
an Online Presence:
Showcase your digitized patches by building an
online presence. Create a website or utilize social media platforms to display
your designs. Include high-quality images and detailed descriptions to attract
potential customers or collaborators.
Collaborations and Customization:
Explore collaborations with brands,
organizations, or individuals interested in custom patches. Offering
customization options allows customers to create patches that align with their
unique identity or brand image.
Participating in Events and Markets:
Attend events, markets, or trade shows to showcase your digitized patches in person. Networking with potential clients, customers, or collaborators provides opportunities for growth and exposure.
Conclusion
Digitizing patches
is a journey that intertwines creativity, technology, and craftsmanship. From
the initial concept and design ideation to the meticulous process of
digitization, testing, and final production, each step contributes to the
creation of a unique and meaningful patch. As these digitized patches find
their way onto garments, accessories, and various surfaces, they become more
than mere embellishments – they are symbols of identity, stories, and the
artistry of embroidery. Embrace the versatility of digitized patches, and let
your creations stitch narratives into the fabric of personal expression and
collective identity.


