Master How to Digitize a Logo for Embroidery Online Like a Pro
At its core, digitizing a logo means converting a graphic image or design into a sequence of instructions that an embroidery machine can follow. These instructions include details on stitch types, sequence, and even thread color. Through digitization, a logo is no longer static artwork; it becomes a functional, dynamic design that can be replicated with precision on a variety of materials. This process ensures that even intricate elements, like fine lines or small text, are properly represented, avoiding distortion during the stitching process. Digitizing allows for the creation of consistent designs that remain true to the original logo, regardless of the size or fabric type.
Key Terms and Concepts Every
Beginner Should Know
For those just entering the world of logo digitizing, it’s crucial to
familiarize oneself with a few basic terms. "Stitch types" refer to
the different ways a needle can create a pattern—satin, running, and fill
stitches are the most common. "Density" refers to how tightly the
stitches are placed, which affects the texture and clarity of the design.
"Underlay" is a base layer of stitching that helps stabilize the
fabric before the final design is stitched. Understanding these concepts is
crucial for creating professional-quality digitized logos. Without these
considerations, a logo may appear uneven or lack definition, leading to a
subpar embroidery result. Additionally, adjusting stitch types and densities
for different fabric types and logo complexities is essential to achieving the
perfect embroidered look.
The Importance of High-Quality
Artwork for Digitizing
Before you even start the digitizing process, high-quality artwork is
vital. A logo with pixelated edges, low resolution, or blurry details will only
lead to challenges during digitization. Clean, high-resolution files
(preferably vector files) make the entire digitization process smoother. They
allow the digitizer to retain the sharpness of the design and avoid errors such
as jagged lines or distorted shapes. High-quality artwork also ensures that the
final embroidery will reflect the true vision of the brand. The clarity of the
original design translates directly into how well it is represented in the
thread, ensuring that no detail is lost in the stitching process.
Choosing the Right Software for Online Digitizing
Overview of Popular Digitizing
Tools
Several software options are available for digitizinglogos online. Popular choices include Wilcom, Hatch, and Brother
PE-Design. These tools allow you to import logos, adjust stitches, and
customize designs for various fabrics. Some software programs are more suited
to beginners, while others offer advanced features for professionals. Each tool
comes with unique features, so it’s essential to choose one that suits your
needs and skill level. Some software even integrates with specific embroidery
machines, making it easier to directly export the finalized design. When
selecting software, it's important to consider the software's compatibility
with your operating system and your machine’s specifications for optimal
results.
Pros and Cons of Free vs. Paid
Software Options
Free software may seem enticing, but it often comes with limitations.
While you might find basic tools and features, free programs generally lack the
precision and customization offered by their paid counterparts. On the other
hand, paid software usually offers more advanced features, customer support,
and the ability to handle complex designs. However, the learning curve can be
steeper, and the upfront cost might be a concern for those just starting. It’s
essential to assess whether the free software’s capabilities meet your design
needs or if investing in a paid version will ultimately save you time and money
in the long run. Paid options often include a wealth of resources, such as
video tutorials and access to dedicated customer service, ensuring that users
can troubleshoot issues quickly and efficiently.
How to Select the Best Software
for Your Logo Needs
When choosing software, consider the complexity of your design, your
experience level, and the type of embroidery machine you use. Some software
tools are compatible with specific machines, while others offer broader
flexibility. If you're a beginner, look for user-friendly programs with plenty
of tutorials and resources. If you’re a professional, prioritize software that
gives you more control over stitch types, densities, and other technical
aspects of logo digitizing. A good choice of software can help you avoid common
issues like misaligned stitches, poor-quality resolution, and wasted time. It’s
also important to factor in future growth; as your skills improve, you’ll want
software that can grow with you.
Preparing
Your Logo for Digitization
Checking the Resolution and
Quality of Your Logo File
A high-quality logo file is crucial for smooth digitization. Ensure
the resolution is high (at least 300 dpi) to avoid pixelation when enlarging
the design. Low-resolution images will result in poor-quality embroidery, with
blurred lines and a lack of clarity. Checking your logo's resolution before
beginning the digitizing process can save time and frustration later. It’s also
helpful to ensure that the logo is free from compression artifacts, which can
distort the image. If your logo includes gradients or multiple color transitions,
ensuring the quality of the file will help to replicate those subtle details in
the final embroidery without any pixelated or jagged edges.
Simplifying Complex Designs for
Easy Digitization
Sometimes, the most intricate logos can be too complicated for
efficient digitization. Simplifying a design by removing excessive details,
small text, or unnecessary gradients can make the digitizingprocess more manageable. This doesn’t mean sacrificing creativity, but
rather making sure the logo is functional when it’s embroidered. By
streamlining overly complicated elements, you can prevent issues such as
excessive thread buildup, which can make the design look bulky or uneven.
Additionally, simplifying designs ensures that embroidery machines can execute
the design without unnecessary adjustments, improving production speed and
consistency.
Why Vector Files Are Your Best
Friend
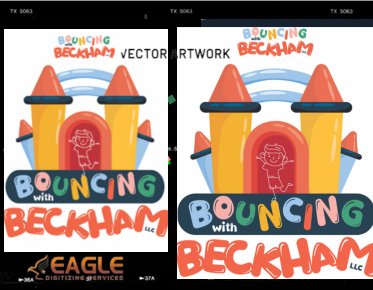
Vector files (such as .ai or .eps formats) are the gold standard in
logo digitizing. Unlike raster images, which are made of pixels, vector images
are composed of paths, meaning they can be scaled to any size without losing
quality. This is especially important for logos that will be embroidered onto
varying fabric sizes, ensuring sharp and clear designs every time. Vector files
also provide cleaner, more precise edges, which are crucial when digitizing
logos for embroidery. By starting with vector artwork, you set yourself up for
a smoother digitization process and a more professional final product, free
from the distortions that often occur with rasterized images.
How
to Set Up Your Design for Embroidery Machines
Understanding Stitch Types and
Their Roles (Satin, Fill, Running)
Different parts of your logo may require different types of stitches.
Satin stitches are often used for text or thin outlines, as they create smooth,
shiny lines. Fill stitches, on the other hand, are used for larger areas,
offering more coverage. Running stitches are commonly used for details like
outlines or thin lines, offering a delicate touch. Understanding which stitch
type to use in each area of the logo is key to achieving a professional result.
The wrong stitch type in the wrong area can lead to a poorly defined design or
even cause the fabric to be distorted. Adjusting stitch types also affects the
overall texture and appearance of the embroidery, ensuring that fine details
are captured with precision and that larger areas have the necessary fill to
maintain a clean, crisp appearance.
Determining Stitch Density and
Its Impact on Design Quality
Stitch density is the amount of space between each stitch. If the
stitches are too dense, the fabric may not lie flat, and the design could look
bulky. Conversely, if the density is too sparse, the design might appear weak
or transparent. Proper stitch density ensures that the logo maintains its shape
and clarity while also adhering to the fabric’s properties. This balance is
crucial for both the aesthetics and durability of the design. If you're working
with thicker fabrics, you might need a higher density to ensure the design
doesn’t sink into the material, while lighter fabrics may require lower density
to avoid overstuffing the stitches and creating an overly stiff look. Proper
density also helps prevent common issues like thread breaks or puckering,
leading to a smoother, more professional finish.
Setting Proper Color Schemes for
Embroidery
Color choices in your logo must be chosen carefully when digitizing.
Unlike digital designs that use RGB or CMYK color spaces, embroidery requires
thread colors, each with its thread thickness and texture. Make sure to use
thread colors that contrast well against the fabric to ensure your logo is
visible from a distance. Additionally, be mindful of color transitions in the
design—smooth gradients may be challenging to replicate in embroidery, so solid
colors or simple transitions often work better. You’ll also want to consider
thread types and finishes, as different threads (like metallic or matte) behave
differently and can influence the overall aesthetic of the design. Testing
color combinations during the design process will help to ensure that your logo
stands out and remains readable on various fabric types and under different
lighting conditions.
Step-by-Step
Guide to Digitizing a Logo Online
Uploading Your Logo to Your
Chosen Software
Start by uploading your logo file to your digitizingsoftware. Ensure that the file is in a format that the software can read
(vector files are ideal). Once uploaded, you can begin manipulating the design
to suit the embroidery process. This step usually includes adjusting the size,
ensuring the resolution is appropriate, and cropping out any unnecessary
elements. Most digitizing software allows you to see an outline of the design,
which can help you identify problem areas before starting to work on stitch
adjustments. Once the basic setup is complete, you can move on to more detailed
modifications, such as adjusting stitch types and colors, ensuring the design
fits perfectly within the embroidery hoop.
Breaking Down the Logo into
Manageable Sections
A complex logo can be overwhelming, but breaking it down into smaller,
more manageable sections makes the digitizing process easier. Work on one
section at a time, focusing on different elements such as text, shapes, and
borders. This step ensures that every part of the logo is optimized for
stitching. Large logos or intricate designs may need to be simplified or
divided into layers so the machine can execute them in stages. Each section
should be carefully considered, from the overall design flow to the stitch
direction, ensuring everything aligns perfectly once stitched out. This
segmented approach helps avoid confusion during the embroidery process and
allows for better control over the final result.
Assigning Appropriate Stitches
and Adjusting for Fabric Types
Once you’ve divided the design into sections, assign the appropriate
stitches to each one. Be sure to adjust your choices based on the fabric you
plan to use, as some fabrics may require more dense stitches or certain stitch
types for optimal results. For instance, dense fabrics like denim or canvas
require more robust stitch choices to ensure the design is clear, while
lightweight fabrics like cotton or silk need softer, lighter stitches to
maintain a clean and fluid look. Additionally, some elements of your logo, such
as fine details or text, may require specific adjustments to stitch type and
density to ensure they remain sharp and legible after stitching. Always test on
a fabric swatch to verify that the stitches perform as expected.
Testing the Design for Alignment
and Balance
After digitizing, it’s essential to test the design to ensure all elements align and balance properly. The spacing between stitches should be even, and there shouldn’t be any areas where the design appears distorted or unbalanced. Run a test stitch-out to check for any imperfections. This step allows you to see how the design looks in real life, providing valuable insight into whether adjustments are needed. It’s particularly important to check how the design behaves on the actual fabric, as colors, stitch types, and density may react differently than expected. Testing ensures that the final product is visually appealing and free from errors, saving time and resources during production.
.png)


