Easy Steps to Convert Raster Images to Vectors in Illustrator
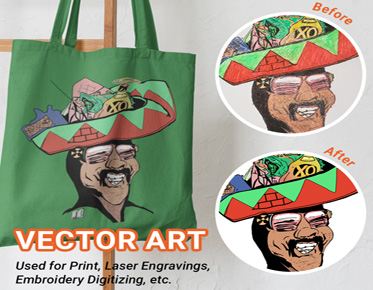
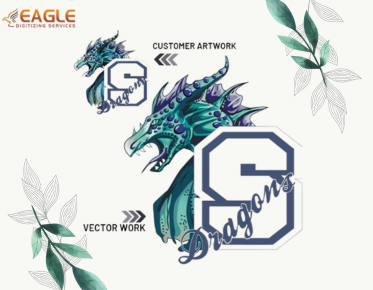
Raster images, which are made up of pixels, are ideal for photographs and complex images with subtle color gradations. However, raster images can lose quality when scaled up, leading to pixelation and blurred details. On the other hand, vector graphics are composed of mathematical equations, enabling them to be resized infinitely without losing quality. In Adobe Illustrator, converting a raster image into a vector graphic is a fundamental skill, and it ensures your designs can be used across different platforms and sizes without any loss of clarity.
This article will guide you through the process of converting raster images (such as JPEGs, PNGs, or GIFs) into vectors using Adobe Illustrator. We'll explain each step, providing tips for refining the vectorized image and avoiding common pitfalls.
Understanding Raster vs. Vector Images
Before diving into the process, it's essential to understand the key differences between raster and vector images:
● Raster Images are composed of pixels, each holding specific color information. Popular formats include JPEG, PNG, and GIF. When you zoom in on a raster image, individual pixels become visible, and the image appears pixelated. This is particularly problematic when scaling up an image.
● Vector Images are made up of points, lines, curves, and shapes defined by mathematical equations. Popular vector formats include AI, SVG, and EPS. Vector images are resolution-independent, meaning they can be scaled to any size without loss of quality.
Benefits of Vector Graphics
● Scalability: Vector images can be resized indefinitely, from a small logo on a business card to a massive billboard, without any quality loss.
● Editability: Since vectors are built from shapes and paths, individual elements can be easily modified without affecting the entire design.
● File Size: Vector files are often smaller than high-resolution raster images, which makes them easier to store, transfer, and load on websites.
With these advantages in mind, let's move on to converting your raster image into a vector graphic using Adobe Illustrator.
Step-by-Step Guide to Converting a Raster Image into a Vector
Choosing the Right Raster Image
Not all raster images are equally suitable for vector conversion. Images with high contrast, distinct edges, and fewer colors are the easiest to convert to vector format. Logos, icons, and simple illustrations work well, while photographs or images with complex details can be more challenging.
For the best effects, use a high-resolution photograph (at least 300 DPI). This ensures that the edges are clean and defined, resulting in a smoother vector conversion.
Open the Raster Image in Adobe Illustrator
Once you've selected your raster image, open it in Adobe Illustrator:
1. Launch Adobe Illustrator.
2. Go to File > Open and browse to find your image, or drag and drop the image directly into the workspace.
After the image is opened in Illustrator, you'll be ready to convert it into a vector graphic.
Using the Image Trace Tool
The Image Trace tool in Illustrator is one of the easiest ways to convert a raster image into a vector. Here's how to use it:
1. Select the Image: Click on the image to select it. You’ll see a bounding box around the image once it's selected.
2. Open the Image Trace Panel: You can find Image Trace in the top toolbar or go to Window > Image Trace to bring up the panel if it's not already visible.
3. Choose a Preset: Illustrator provides several presets for tracing images, which you can use based on the complexity of the image. Here are some popular presets:
● Black and White Logo: Ideal for monochromatic images.
● High-Fidelity Photo: For complex images or photographs.
● Low-Fidelity Photo: For images with less detail.
● 3 Colors, 6 Colors, 16 Colors: Use these for images with a limited color palette.
4. Adjust the Settings: While the presets can provide a good starting point, you’ll often need to adjust the settings to get the best result:
● Mode: Choose between Black and White, Grayscale, or Color depending on your image.
● Threshold: Adjust the threshold for how light or dark pixels are traced.
● Paths: Increase or decrease the number of paths in the image trace. More paths lead to a more accurate trace but can result in a more complex vector.
● Corners: This controls how rounded the corners of the traced objects are.
● Noise: This option determines how much detail is ignored. Lower values produce more detailed traces.
Preview and Refine the Image Trace
After selecting a preset and adjusting the settings, click Preview to see what the vectorized version of your image will look like. Depending on the complexity of your image and the performance of your computer, it may take a moment for the preview to appear.
If the vector version doesn't look quite right, adjust the settings and try again. Play around with the Threshold, Paths, Corners, and Noise settings until the vectorized image closely resembles the original raster image.
Expand the Vector
Once you are satisfied with the Image Trace preview, click the Expand button in the top toolbar. Expanding the image converts the trace into editable vector paths.
At this point, you will see the image broken into individual vector objects. Each color, shape, and line from the original image is now its distinct object that can be edited independently.
Cleaning Up the Vector
After expanding, you may notice that the traced image isn't perfect. Extra paths, rough edges, and stray shapes might need to be cleaned up. Here's how you can refine your vector:
● Ungroup the Objects: After expanding, the image may still be grouped. To edit individual parts of the image, go to Object > Ungroup.
● Delete Unnecessary Paths: Use the Direct Selection Tool (A) to select and delete unwanted paths, such as those created by noise or background artifacts.
● Smooth Out the Paths: If the vectorized image has jagged or rough edges, you can smooth it out by using the Smooth Tool (found under the Pencil tool) or adjusting the anchor points with the Pen Tool.
Simplifying the Path
Vector files with too many anchor points can become complicated to edit. They also result in larger file sizes. To simplify the paths:
● Select the entire image.
● Go to Object > Path > Simplify.
● In the dialog box, reduce the number of anchor points and adjust the curve precision. You can preview the results in real-time and fine-tune it to strike a balance between detail and simplicity.
Adding Color and Refining the Design
Once the vector paths are cleaned up, you can start adding color or making additional refinements. Use the Direct Selection Tool to select specific paths and change their fill or stroke color. You can also use Illustrator's many other tools to further enhance your vector, such as:
● Pen Tool (P): Use this tool to add or adjust anchor points manually for a more refined design.
● Shape Builder Tool (Shift+M): Combine or subtract shapes in the vector to simplify complex areas.
● Gradient Tool (G): Add gradients to different parts of the vector for a more polished look.
Saving the Image as a Vector
Once you are happy with the vectorized image, it's time to save it. Adobe Illustrator supports several vector file formats, depending on your needs:
● AI (Adobe Illustrator): This is the native file format of Adobe Illustrator and the best option if you need to edit the image in the future.
● SVG (Scalable Vector Graphics): Ideal for web use and responsive design because it can be resized without quality loss.
● EPS (Encapsulated PostScript): A widely compatible format for print design.
● PDF (Portable Document Format): Useful for sharing and printing as it retains vector data.
To save, go to File > Save As, and choose the appropriate file format.
Advanced Tips for Better Vectorization
Simplifying Complex Images
Highly detailed images like photographs can be challenging to vectorize due to the large number of colors and shapes. If you need to vectorize a complex image, consider simplifying the image first by reducing the number of colors or cropping unnecessary details.
● Photoshop Pre-processing: Before vectorizing in Illustrator, open the image in Photoshop and simplify it by reducing noise, increasing contrast, and converting it to a limited color palette.
Manual Tracing with the Pen Tool
If the Image Trace tool doesn't give satisfactory results, you can manually trace the image using Illustrator’s Pen Tool. This method is more time-consuming but gives you complete control over the precision of the paths.
● Use the Pen Tool (P) to manually trace around the key features of the image. This works well for logos, icons, or geometric designs where accuracy is critical.
Using the Live Paint Tool for Coloring
Once the vector paths are defined, you can quickly color different sections of your vector using the Live Paint Bucket Tool (K). This allows you to "paint" sections of the vector without worrying about overlapping paths.
● Select the image, go to Object > Live Paint > Make, and use the Live Paint Bucket Tool to fill different areas with color.
Common Mistakes to Avoid
1. Using Low-Resolution Images: The higher the resolution of your raster image, the better the vector conversion will be. Low-resolution images often result in jagged, unclear paths.
2. Not Simplifying the Path: Too many anchor points can lead to complex vectors that are difficult to work with. Always simplify paths to make the image more manageable.
3. Overcomplicating the Design: When vectorizing complex images, try to focus on the key elements rather than preserving every detail. Vector graphics are often most effective when they are simple and clean.
Converting a raster image to a vector in Adobe Illustrator is a powerful way to ensure your designs are scalable, editable, and versatile. The Image Trace tool simplifies the process, but achieving the best results often requires tweaking settings, refining paths, and cleaning up unnecessary details. With practice, you'll develop the skills to transform any raster image into a high-quality vector graphic that meets your design needs.
By mastering vector artwork conversion in Illustrator, you gain greater control over your artwork, whether for logos, illustrations, or complex design projects.


.png)
