How to Turn Any Painting into Vector Art?
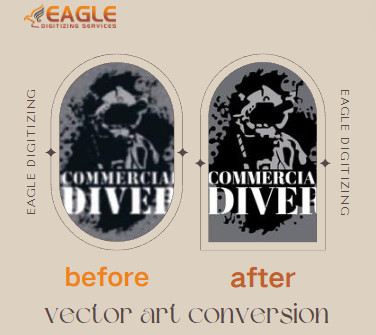
Turning a traditional painting into vector art is a fantastic way to modernize and digitize your artwork. Vector art is versatile, scalable, and perfect for a variety of applications, from digital media to print. This guide will walk you through the process, from understanding what vector art is to fine-tuning your final product. Here are Some Points You Should Be Aware of Regarding vector art services online!
Why Convert Paintings to Vector Art?
Benefits of Vectorizing Artwork
Vectorizing your artwork brings a host of benefits. It allows for easy resizing without losing detail, making your art suitable for everything from business cards to billboards. Vector art is also easier to edit, allowing for color changes, adjustments to individual elements, and more flexibility in design.
Versatility and Scalability
One of the main advantages of vector art is its versatility. It can be used across various media, including websites, posters, apparel, and digital presentations. The scalability of vector graphics ensures that your artwork retains its quality and detail, regardless of the output size.
Preparing Your Painting for Conversion
Choosing the Right Painting
Not every painting will translate well into vector art. Choose a painting with clear lines, distinct shapes, and strong contrasts. Paintings with too much intricate detail or subtle color gradients may be challenging to convert effectively.
Photographing or Scanning Your Painting
To convert a painting into vector art, you need a high-quality digital image of the artwork. Use a high-resolution scanner if the painting is small enough, or a high-quality camera for larger pieces. Ensure even lighting to avoid shadows and color distortion.
Selecting the Right Tools
Popular Software Options
There are several software options available for vectorizing artwork. Adobe Illustrator is the industry standard, known for its robust features and precision. CorelDRAW is another powerful option, while Inkscape is a free, open-source alternative.
Adobe Illustrator, CorelDRAW, and Inkscape
● Adobe Illustrator: Offers comprehensive tools for creating and editing vector art. Ideal for professionals.
● CorelDRAW: Known for its user-friendly interface and powerful features, suitable for all skill levels.
● Inkscape: Free and open-source, perfect for beginners and those on a budget.
Setting Up Your Workspace
Importing Your Image
Once you've selected your software, import your high-resolution image. This serves as the base for your vector tracing. Position it centrally on your canvas for easy access to all areas of the painting.
Adjusting Canvas Size and Resolution
Set your canvas size to match the dimensions of your original painting. To achieve the best possible output quality, adjust the resolution settings. This step is crucial for maintaining the integrity of the details during the tracing process.
Tracing Your Painting
Manual Tracing vs. Auto Tracing
There are two main methods for converting a painting into vector art: manual tracing and auto-tracing. Manual tracing involves drawing over the image using vector tools, while auto tracing uses software algorithms to create vector paths automatically.
Pros and Cons of Each Method
● Manual Tracing: Offers greater control and precision but can be time-consuming.
● Auto Tracing: Faster and easier but may require extensive clean-up and adjustments for complex images.
Using Auto Trace Tools
How Auto Trace Works
Auto-trace tools analyze the pixel data of your image and convert it into vector paths. This process can be quick, but the results often need refinement to match the quality of manual tracing.
Best Practices for Auto Tracing
Start with a high-resolution image to improve the accuracy of the auto trace. Use software settings to adjust the level of detail and smoothness. After auto-tracing, review and refine the vector paths to correct any inaccuracies.
Manual Tracing Techniques
Outlining Major Shapes
Begin by outlining the major shapes and forms in your painting. Use the pen tool to create smooth, clean lines. Focus on capturing the essential structure and flow of the artwork.
Adding Details and Textures
Once the major shapes are in place, add finer details and textures. Use a combination of tools to replicate the original painting's intricate elements, ensuring that the vector version retains its artistic integrity.
Working with Layers
Organizing Your Vector Layers
Organize your vector layers to keep your workspace tidy and efficient. Group similar elements together and use descriptive names for each layer. This organization helps manage complex designs and makes editing easier.
Layer Management Tips
Lock layers that you are not currently working on to avoid accidental edits. Use sub-layers for more detailed sections and keep a consistent naming convention to streamline your workflow.
Cleaning Up Your Vector Art
Removing Unnecessary Points
Simplify your vector paths by removing unnecessary points. This reduces file size and makes the artwork easier to edit. Focus on maintaining smooth, flowing lines without compromising detail.
Smoothing Out Lines and Curves
Refine your lines and curves to ensure they are smooth and natural. Use the smoothing tool or adjust individual points manually for precision. This step enhances the overall quality of your vector art.
Coloring Your Vector Art
Using the Eyedropper Tool
Use the eyedropper tool to sample colors directly from your original painting. This ensures that your vector art retains the authentic color palette of the original piece.
Creating a Color Palette
Create a color palette based on the sampled colors. Organize the palette to include primary colors, secondary shades, and any unique hues present in the painting. This palette will be your reference for coloring the vector art.
Adding Depth and Shadows
Techniques for Adding Dimension
Add depth and dimension to your vector art by incorporating shading and highlights. Use techniques such as gradient fills, blending modes, and layered shapes to create a three-dimensional effect.
Using Gradients and Blending Modes
Gradients and blending modes can enhance the realism of your vector art. Experiment with different gradient styles and blending options to achieve the desired effect, adding depth and complexity to your artwork.
Fine-Tuning Your Vector Art
Adjusting Stroke and Fill
Fine-tune the stroke and fill settings for each vector path. Adjust the stroke width and color to match the original painting's lines, and ensure that the fill colors are consistent and accurate.
Enhancing Details
Review your vector art for any areas that need additional refinement. Enhance details by adding subtle touches, such as fine lines or texture variations, to capture the essence of the original painting.
Exporting Your Vector Art
Choosing the Right File Format
Select the appropriate file format for your vector art based on its intended use. Common formats include SVG for web use, EPS for print, and AI for Adobe Illustrator compatibility.
Settings for Different Uses
Adjust the export settings to match the requirements of your final application. For web use, optimize file size without compromising quality. For print, ensure high resolution and color accuracy.
Using Your Vector Art
Applications in Print and Digital Media
Vector art is highly versatile and can be used in various applications, including logos, posters, websites, and promotional materials. Its scalability and quality make it ideal for both print and digital media.
Licensing and Usage Rights
Ensure that you have the appropriate licensing and usage rights for your vector art. If you plan to sell or distribute the artwork, understand the legal implications and secure the necessary permissions.
Tips for Maintaining Artistic Integrity
Preserving the Essence of the Original Painting
When converting a painting to vector art, strive to preserve the essence and character of the original artwork. Focus on capturing the unique style, colors, and details that define the painting.
Balancing Creativity and Precision
Maintain a balance between creativity and precision in your vector art. While technical accuracy is important, don't lose sight of the artistic expression that makes your painting unique.
Common Challenges and How to Overcome Them
Dealing with Complex Details
Complex details can be challenging to vectorize. Break down intricate areas into simpler shapes and use multiple layers to manage complexity. Patience and attention to detail are key.
Troubleshooting Common Issues
Common issues in vector art conversion include jagged lines, color mismatches, and loss of detail. Address these by refining your paths, adjusting color settings, and using higher-resolution images.
Inspiration and Examples
Showcase of Successful Conversions
Explore examples of successful painting-to-vector conversions to gain inspiration and insight. Analyze the techniques used and apply them to your projects to achieve similar results.
Learning from Other Artists
Learn from other artists who have mastered the art of vectorization. Join online communities, attend workshops, and engage with fellow creatives to expand your knowledge and skills.
Advanced Techniques
Adding Text and Typography
Incorporate text and typography into your vector art to create dynamic and engaging designs. Experiment with different fonts, sizes, and styles to complement your artwork.
Integrating Vector Art with Other Media
Combine vector art with other media, such as photography or raster images, to create unique and multifaceted designs. Use blending modes and masking techniques to achieve seamless integration.
Resources and Tutorials
Recommended Reading and Videos
Enhance your skills by exploring recommended reading materials and tutorial videos. There are numerous resources available that cover everything from basic techniques to advanced vector art methods.
Online Communities and Forums
Join online communities and forums dedicated to vector art and digital design. These platforms provide valuable support, feedback, and networking opportunities for artists of all levels.
Vectorizing a painting is a rewarding process that combines traditional artistry with digital precision. By following this guide and practicing regularly, you can master the art of converting paintings into stunning vector graphics. Embrace experimentation, learn from challenges, and stay inspired by the evolving world of vector art.


.png)