Insider Secrets to Perfect 3D Foam Digitizing: Learn from the Pros
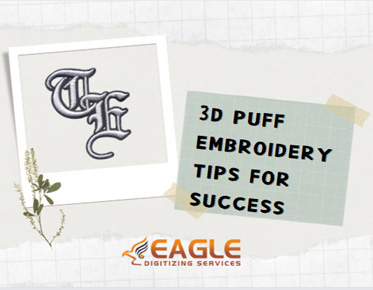
3D foam in embroidery is a game-changer, adding a tactile and visual depth to your designs that really makes them pop. Whether you're looking to create standout logos, bold lettering, or unique patterns, digitizing with 3D foam opens up a whole new world of creative possibilities. Dive in to learn how to make the most of this exciting technique and bring your embroidery projects to life.
Why Use 3D Foam?
Using 3D foam in embroidery offers several benefits. It adds a striking, professional look to your designs, making them more eye-catching. The raised effect can also enhance the durability of the embroidery, protecting it from wear and tear. Additionally, 3D foam allows for greater creative expression, enabling more complex and visually appealing designs.
Choosing the Right 3D Foam
Different Types of 3D Foam
3D foam comes in various thicknesses and densities, typically ranging from 2mm to 6mm. The type of foam you choose will depend on the desired height and the intricacy of your design. Thicker foam is great for bold, simple designs, while thinner foam works better for detailed patterns.
Factors to Consider When Selecting Foam
When selecting foam, consider the fabric you're working with, the design's complexity, and the desired effect. The foam should be compatible with your embroidery machine and needles. It’s also important to choose foam that complements the colors of your thread and fabric to prevent any unwanted visibility through the stitches.
Preparing Your Design for 3D Foam
Design Elements That Work Best with 3D Foam
Bold, simple shapes and large lettering are ideal for 3D foam embroidery. Designs with clean lines and minimal intricate details tend to work best, as the foam needs enough space to be covered adequately by the stitches. Avoid overly complex patterns that might not translate well with the raised effect.
Adjusting Your Design for Height and Depth
When digitizing for 3D foam, it’s essential to adjust your design to account for the foam's height. Increase the stitch density to ensure the foam is adequately covered and won’t peek through the stitches. Consider adding an extra layer of underlay stitches to create a strong foundation and prevent the foam from shifting.
Creating a Strong Foundation
A strong foundation is crucial for 3D foam embroidery. Use underlay stitches to secure the foam and provide a stable base for the top stitches. This helps in maintaining the design's shape and preventing any movement or distortion of the foam during the embroidery process.
Choosing the Right Stitch Type
Satin Stitches: The Go-To for 3D Foam
Satin stitches are the most commonly used stitch type for 3D foam embroidery. They cover the foam effectively, creating a smooth, raised surface. The length and density of satin stitches can be adjusted to ensure the foam is completely hidden and the design looks polished.
Other Effective Stitch Types
While satin stitches are popular, other stitch types like zigzag and fill stitches can also be used creatively with 3D foam. Experiment with different stitch types to achieve unique textures and effects. Just ensure that the stitches are dense enough to cover the foam and maintain the design's integrity.
Density and Stitch Length Adjustments
Optimizing Density for 3D Foam
Optimizing stitch density is key to successful 3D foam embroidery. Higher density ensures that the foam is fully covered and the design looks solid. However, avoid excessive density, which can cause puckering and make the fabric too stiff. Find a balance that provides good coverage without compromising the fabric’s flexibility.
Adjusting Stitch Length for a Smooth Finish
Adjust the stitch length to ensure a smooth, even finish. Shorter stitch lengths work well for curves and intricate details, while longer stitch lengths are suitable for straight lines and larger areas. The goal is to achieve consistent coverage without gaps or overlapping stitches.
Setting Up Your Embroidery Machine
Machine Settings for 3D Foam Embroidery
Proper machine settings are essential for 3D foam embroidery. Adjust the machine's tension and speed to accommodate the added thickness of the foam. Use a slower speed to ensure precise stitching and prevent the foam from shifting. Regularly check and adjust the settings as needed to maintain optimal performance.
Needle and Thread Selection
Choosing the right needle and thread is crucial. Use a sharp, heavy-duty needle to penetrate the foam without breaking. Polyester or rayon threads are ideal for their strength and sheen. Match the thread color to the foam and fabric to achieve a cohesive look and avoid any visible foam edges.
Applying 3D Foam to Your Fabric
Proper Placement and Securing Techniques
Proper placement and securing of the foam are vital. Position the foam on the fabric before starting the embroidery. Use temporary adhesive spray or pins to keep the foam in place. Ensure the foam aligns perfectly with the design to avoid any shifts or misalignment during stitching.
Avoiding Shifts and Misalignment
To prevent shifts and misalignment, use a basting stitch to secure the foam to the fabric. This temporary stitch holds the foam in place and can be removed after the embroidery is complete. Additionally, ensure the fabric is hooped tightly to minimize movement.
Digitizing Techniques for 3D Foam
Layering Techniques for Depth
Layering stitches is an effective technique to add depth and dimension to your 3D foam embroidery. Start with underlay stitches to secure the foam, then add multiple layers of top stitches to build up the height. This creates a robust, raised effect that stands out beautifully.
Creating Clean Edges and Borders
Clean edges and borders are essential for a polished look. Use a combination of satin stitches and outline stitches to define the design’s edges. Ensure the stitches are tight and close together to prevent the foam from peeking through and to create a smooth, professional finish.
Common Mistakes and How to Avoid Them
Overstitching and Puckering
Overstitching can lead to puckering and distortion. Avoid excessive stitch density and overlapping stitches. Instead, focus on achieving even coverage with the right balance of density and stitch length. Regularly monitor your machine to prevent any issues during embroidery.
Choosing the Wrong Foam Type
Choosing the wrong foam type can compromise your design. Ensure the foam’s thickness and density match your design’s requirements. Test different foams to find the best fit for your project. Using the right foam ensures a professional finish and prevents any issues with coverage and alignment.
Special Tips for Lettering with 3D Foam
Ensuring Readability and Clean Lines
For lettering, readability is paramount. Use bold, simple fonts with clean lines. Avoid overly ornate or intricate fonts that can become distorted. Increase the stitch density to ensure each letter is well-defined and the foam is fully covered.
Spacing and Size Considerations
Proper spacing and size are crucial for lettering. Ensure there’s enough space between letters to prevent overcrowding and overlapping. Adjust the size to ensure each letter is large enough to accommodate the foam and maintain clarity.
Finishing Touches
Removing Excess Foam
After completing the embroidery, carefully remove any excess foam. Use small scissors or tweezers to trim away the foam around the design. Be cautious not to cut the stitches. Removing the excess foam reveals the clean, raised effect of your embroidery.
Adding Final Embellishments
Add final embellishments to enhance your design. Consider using additional embroidery techniques, such as adding sequins or beads, to create a unique look. These embellishments can add extra dimension and make your design stand out even more.
Caring for Your 3D Foam Embroidered Items
Washing and Drying Tips
Proper care is essential to maintain the quality of your 3D foam embroidery. Wash embroidered items gently, preferably by hand or on a delicate machine cycle. Avoid using harsh detergents or bleach. Lay items flat to dry to prevent any deformation of the foam.
Storage Recommendations
Store 3D foam embroidered items properly to maintain their shape. Avoid folding or compressing the foam. Instead, store items flat or on hangers. Keep them in a cool, dry place to prevent any damage from moisture or heat.
Troubleshooting Common Issues
Foam Shifting During Embroidery
Foam shifting is a common issue. Ensure the foam is securely placed before starting and use basting stitches to hold it in place. Adjust your machine’s speed and tension settings to prevent movement during embroidery.
Stitches Not Penetrating Foam
If stitches aren’t penetrating the foam, check your needle and thread selection. Use a sharp, heavy-duty needle and strong thread. Adjust the stitch length and density to ensure the foam is fully covered and the stitches penetrate effectively.
Showcasing Your 3D Foam Creations
Photography Tips for Maximum Impact
To showcase your 3D foam creations, use high-quality photography. Capture the raised effect and intricate details with good lighting and close-up shots. Use a plain background to highlight the design and avoid distractions.
Sharing on Social Media and Online Platforms
Share your 3D foam creations on social media and online platforms to reach a wider audience. Use hashtags and tags to connect with the embroidery community. Share behind-the-scenes shots and videos to engage your audience and showcase your process.
Advanced Techniques and Creativity
Combining 3D Foam with Other Materials
Combine 3D foam with other materials to create unique, textured designs. Experiment with fabrics, sequins, and beads to add depth and dimension. This combination can create stunning, one-of-a-kind pieces that stand out.
Exploring Different Design Styles
Explore different design styles to expand your creative horizons. Try geometric patterns, abstract designs, or floral motifs. Experimenting with various styles keeps your work fresh and innovative.
Inspiration and Ideas
Popular Designs and Trends with 3D Foam
Stay updated with popular designs and trends in 3D foam embroidery. Bold logos, athletic lettering, and intricate patterns are trending. Follow industry leaders and embroidery forums for inspiration and new ideas.
Creative Uses Beyond Apparel
Think beyond apparel for your 3D foam projects. Use this technique for home décor items, such as cushions, wall hangings, and table runners. Personalized gifts, like embroidered bags and accessories, also benefit from the added dimension of 3D foam.
Embrace the trend of 3D foam embroidery to elevate your designs. This technique adds a unique, professional touch that sets your work apart. Whether you’re a hobbyist or a professional, 3D foam opens up endless possibilities for creativity.
Don’t be afraid to experiment and innovate with 3D foam embroidery digitizing. Try new techniques, explore different materials, and push the boundaries of your creativity. The world of 3D foam embroidery is full of potential – dive in and let your imagination soar.


.png)
