Unlock the Art of Embroidery Digitizing
Embroidery digitizing is the fascinating process of transforming artwork into a digital file that an embroidery machine can understand and stitch out on the fabric. This art form marries traditional craftsmanship with cutting-edge technology, allowing for intricate and precise designs to be brought to life on various textiles.
Understanding
the Basics of Embroidery Digitizing
At its core, embroidery digitizing involves converting images, logos, or text into a format that an embroidery machine can use. This conversion is crucial because it tells the machine exactly where and how to stitch each part of the design, ensuring accuracy and consistency. The digitizing process involves selecting the right stitch types, adjusting stitch density, and considering the fabric type to achieve the best results.
The
History of Embroidery Digitizing
Embroidery has been a cherished craft for centuries, but the advent of digitizing has revolutionized the industry. The journey began in the late 20th century with the introduction of computerized embroidery machines. These machines could read digitized files, making mass production of intricate designs possible. Over the years, software advancements have made digitizing more accessible and sophisticated, allowing even hobbyists to create professional-quality designs.
Why
Digitize Embroidery? The Benefits Explained
Digitizing embroidery offers numerous benefits. Firstly, it ensures precision and uniformity, which is essential for commercial projects. Secondly, it saves time, allowing for faster production without compromising quality. Additionally, digitized designs can be easily edited and reused, providing flexibility and cost-effectiveness. Finally, it opens up endless creative possibilities, enabling the creation of complex and detailed patterns that would be impossible to achieve by hand.
How
Embroidery Digitizing Works
The digitizing process begins with artwork, which is scanned or imported into digitizing software. The software then converts the image into a series of stitches, assigning specific stitch types to different parts of the design. This digital blueprint is then transferred to the embroidery machine, which meticulously stitches the design onto the fabric. The entire process requires a keen eye for detail and a deep understanding of how different stitches will interact with the chosen material.
Key
Components of Embroidery Digitizing Software
Embroidery digitizing software is a powerful tool that offers various features to create detailed designs. Key components include a user-friendly interface, a wide range of stitch types, color management, and editing tools. Advanced software also provides options for automatic digitizing, which can simplify the process for beginners, and manual digitizing, which allows for more precise control over the final output.
Types of Embroidery Machines for
Digitizing
Embroidery machines come in different types, each catering to specific needs. Single-needle machines are ideal for home use and small projects, while multi-needle machines are better suited for commercial use due to their efficiency and ability to handle complex designs. Industrial embroidery machines offer the highest level of performance, capable of producing large quantities of embroidered items quickly and accurately.
Choosing the Right Software for
Embroidery Digitizing
Selecting the right software is crucial for successful digitizing. Beginners might opt for user-friendly software with automated features, while professionals may prefer advanced programs offering extensive customization options. Important factors to consider include compatibility with your embroidery machine, available support and tutorials, and the software’s ability to handle different file formats.
Step-by-Step
Guide to Embroidery Digitizing
Embroidery digitizing involves several steps:
- Import your
artwork into the digitizing software.
- Choose the
appropriate stitch types for different parts of the design.
- Adjust
stitch density and length to ensure durability and quality.
- Assign
colors to each section of the design.
- Preview the
design to check for errors.
- Export the
file in a compatible format for your embroidery machine.
- Transfer the file to the machine and start stitching.
Preparing
Your Artwork for Digitizing
Proper preparation of artwork is crucial for successful digitizing. Ensure your image is clear, high-resolution, and in a format compatible with your software. Simplify complex designs to avoid excessive detail that may not translate well into stitches. Consider the final size of the embroidery to ensure that all elements will be visible and recognizable.
Vector
vs. Raster: What’s Best for Digitizing?
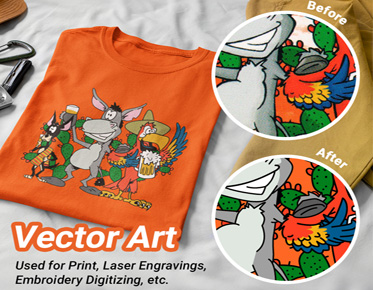
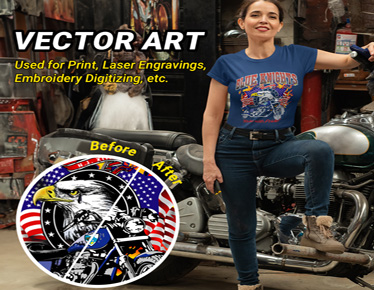
Vector images are typically preferred for digitizing because they can be scaled without losing quality. These images are composed of paths, making them ideal for detailed and intricate designs. Raster images, on the other hand, are made up of pixels and can lose clarity when resized. However, with proper preparation and software, raster images can also be used effectively in embroidery digitizing.
Converting
Images to Embroidery Files
Converting images to embroidery files involves several steps. First, import the image into your digitizing software. Next, use the software’s tools to trace the image and define stitch types for each part. Adjust stitch density, length, and direction to suit the fabric and design requirements. Finally, save the file in a format compatible with your embroidery machine, such as .DST or .PES.
Selecting
the Perfect Stitch Type
Different parts of a design may require different stitch types. Common
options include:
- Satin Stitch: Ideal for outlines and lettering due to its smooth,
shiny finish.
- Fill Stitch: Used for larger areas, providing texture and depth.
- Running Stitch: Perfect for fine details and outlines.
Choosing the right stitch type is crucial for achieving the desired look and ensuring the design holds up over time.
Adjusting Stitch Density and Length
Stitch density refers to the number of stitches within a given area, while stitch length is the distance between individual stitches. Both factors influence the appearance and durability of the embroidery. Higher density provides a more solid look but can make the fabric stiff. Lower density allows for more flexibility but may not cover the fabric as thoroughly. Adjust these settings based on the fabric type and the desired effect.
Adding
Color to Your Embroidery Design
Color selection plays a significant role in the final appearance of your embroidery. Use your digitizing software to assign thread colors to different parts of the design. Consider the fabric color and how it will interact with the thread colors. Some software allows for realistic previews, helping you visualize the final result before stitching begins.
Troubleshooting
Common Digitizing Issues
Common issues in digitizing include thread breaks, poor alignment, and
puckering. To troubleshoot:
- Thread Breaks: Check for proper tension and quality of thread.
- Poor Alignment: Ensure the fabric is hooped tightly and the design
is centered.
- Puckering: Adjust stitch density and use appropriate stabilizers.
Understanding and addressing these issues ensures a smoother embroidery process and better results.
Tips
for Creating High-Quality Digitized Embroidery
To achieve high-quality digitized embroidery, follow these tips:
- Use high-resolution images for clear, detailed designs.
- Choose the right stitch types for different elements.
- Adjust stitch density and length to suit the fabric.
- Conduct test runs to identify and fix issues before final
production.
- Continuously refine your skills through practice and experimentation.
Understanding
Different File Formats in Embroidery Digitizing
Different embroidery machines require specific file formats. Common
formats include:
- .DST: Widely used and compatible with most commercial machines.
- .PES: Popular among home embroidery machines.
- .EXP: Used by many industrial machines.
Ensure your digitizing software can export in the format compatible with your embroidery machine.
Embroidery
Digitizing for Beginners: Common Mistakes to Avoid
Beginners often make mistakes such as using low-quality images, ignoring stitch density, and overlooking the importance of stabilizers. Avoid these pitfalls by starting with simple designs, understanding your software’s features, and gradually advancing to more complex projects. Practice and patience are key to mastering embroidery digitizing.
Advanced
Techniques in Embroidery Digitizing
Advanced techniques include creating 3D puff embroidery, using applique, and incorporating special effects like shading and gradients. These techniques require a deep understanding of digitizing software and embroidery machines, but they can add significant depth and interest to your designs.
Using
Layers and Grouping for Complex Designs
Layers and grouping are essential for managing complex designs. Grouping elements allows you to edit them simultaneously, while layers help organize different parts of the design. This approach simplifies the digitizing process and ensures that changes can be made easily without affecting the entire design.
Incorporating
Text and Fonts in Digitized Embroidery
Text and fonts add personalization to embroidery. Choose fonts that are easy to read and suitable for the design size. Some digitizing software includes built-in fonts, but you can also import custom fonts. Ensure the text is properly spaced and aligned for a professional appearance.
Customizing
Patterns for Personalized Embroidery
Customizing patterns involves adjusting existing designs to suit individual preferences. This can include changing colors, adding or removing elements, and resizing the design. Personalization makes embroidery unique and special, whether for personal use or as a gift.
How
to Optimize Your Design for Different Fabrics
Different fabrics require different digitizing approaches. For stretchy fabrics, use stabilizers to prevent distortion. For delicate fabrics, reduce stitch density to avoid damage. Test your design on a scrap piece of fabric to ensure it stitches well before embroidering the final piece.
Exploring
3D Puff Embroidery Digitizing
3D puff embroidery adds dimension to designs by using foam under the stitches. This technique is popular for creating raised text and logos. Proper digitizing is crucial to ensure the foam is adequately covered and the design looks polished.
Embroidery
Digitizing for Commercial Purposes
For commercial purposes, digitizing must be efficient and scalable. This involves creating designs that can be reproduced consistently and quickly. Consider factors like production time, cost, and customer preferences when digitizing for commercial use.
Licensing
and Legal Considerations in Embroidery Digitizing
Ensure you have the right to use and digitize any artwork, especially for commercial purposes. Respect copyright laws and obtain necessary licenses. Using unauthorized designs can lead to legal issues and damage your reputation.
Future
Trends in Embroidery Digitizing
The future of embroidery digitizing is exciting, with trends like
automation, AI-driven design tools, and eco-friendly practices. As technology
advances, digitizing will become more accessible, allowing even more creativity
and innovation in embroidery.
Bringing
Your Digitized Embroidery to Life
Embroidery digitization is a blend of art and technology, offering
endless possibilities for creativity. By understanding the basics, choosing the
right tools, and continuously refining your skills, you can bring stunning
digitized designs to life, whether for personal enjoyment or commercial
success.


