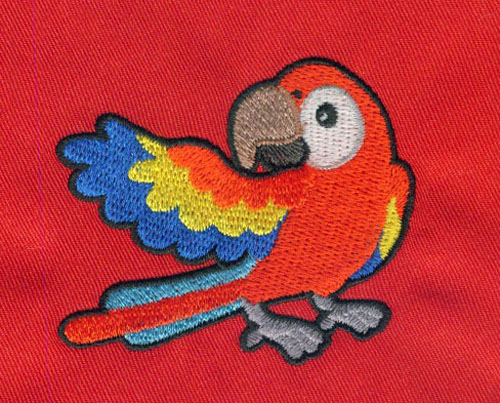
Mastering Photo Digitizing: Turning Pictures into Embroidered Memories
Embroidery has evolved far beyond its traditional roots, embracing modern technologies that bring a new level of personalization and creativity to the craft. One such innovation that has gained widespread popularity is photo digitizing, a process that transforms cherished photographs into intricately stitched works of art. In this blog, we will delve into the art of mastering photo digitizing, exploring the techniques, tools, and creative possibilities that allow embroidery enthusiasts to turn precious memories into unique and enduring creations.
Understanding Photo Digitizing
1. The Basics of Photo Digitizing:
● Photo digitizing involves converting a digital or scanned image into a
format that can be embroidered onto fabric.
● Specialized software is used to translate the intricate details of a
photograph into embroidery-friendly stitch data.
2. Choosing the Right Image:
● Selecting a high-quality image is crucial for successful photo
digitizing. Images with clear details, well-defined lines, and a balanced
composition yield the best results.
● Consider the size of the embroidery design and the intended final product when choosing an image.
Mastering the Techniques of Photo
Digitizing
1. Image Preparation:
● Before diving into digitizing, enhance
the image using photo editing software. Adjust brightness, contrast, and
sharpness to optimize details.
● Convert the image to grayscale or black and white for a cleaner and
more defined result.
2. Understanding Stitch Types:
● Different areas of the image may require various stitch types, such as
satin stitches for smooth areas and fill stitches for broader regions.
● Experiment with stitch densities to achieve the desired level of
detail.
3. Layering for Depth:
● Achieve a realistic effect by layering stitches to create shadows and
highlights. This technique adds depth and dimension to the embroidered photo.
4. Color Matching:
● If the embroidery machine allows for color changes, carefully match
thread colors to the original photo. This attention to detail enhances the
realism of the final product.
5. Test Stitching:
● Before committing to the final embroidery, conduct test stitches on scrap fabric. This step allows for adjustments to be made to stitch settings and colors.
Tools of the Trade: Software and
Machines
1. Embroidery Software:
● Invest in quality embroidery digitizing software, such as Wilcom,
Embird, or Hatch by Wilcom. These programs offer advanced features for precise
control over stitch details.
2. Embroidery Machine Compatibility:
● Ensure that the chosen digitizing software is compatible with your
embroidery machine. Different machines may have specific file format
requirements.
3. High-Quality Threads:
● Use premium embroidery threads for vibrant and long-lasting colors. Thread quality significantly contributes to the overall appearance of the embroidered photo.
Creative Possibilities with Photo
Digitizing
1. Custom Portraits:
● Transform family photos, portraits, or pet pictures into personalized
embroidered portraits. The detailed stitching captures the essence of the
subjects.
2. Special Occasion Keepsakes:
● Commemorate special occasions like weddings, anniversaries, or
graduations by embroidering photos onto keepsakes such as pillows, blankets, or
framed art.
3. Memory Quilts:
● Create unique and sentimental memory quilts by incorporating
embroidered photos alongside other fabric elements. Each square tells a story.
4. Artistic Expression:
● Use photo digitizing as a form of artistic expression. Turn landscapes,
cityscapes, or even abstract images into embroidered artwork.
5. Gifts with a Personal Touch:
● Craft thoughtful gifts by embroidering photos onto everyday items. Personalize garments, tote bags, or even accessories with memories that last a lifetime.
Tips for Successful Photo
Digitizing Projects
1. Start Simple:
● If you're new to photo digitizing, begin with uncomplicated images to
build your skills before tackling more intricate projects.
2. Focus on Details:
● Pay close attention to small details in the image, as these contribute
to the overall accuracy and realism of the embroidered result.
3. Experiment and Learn:
● Embrace a trial-and-error approach. Experiment with different settings,
stitch types, and colors to understand how they impact the final outcome.
4. Keep the End Product in Mind:
● Consider the intended use of the embroidered photo when making design
decisions. A smaller size may require simpler details, while larger pieces can
accommodate more complexity.
5. Seek Inspiration:
● Explore online forums, social media groups, and embroidery communities to gain inspiration and insights from experienced photo digitizers.
Conclusion: A Tapestry of Memories
Mastering photo digitizing opens a world of possibilities for
embroidery enthusiasts, allowing them to weave a tapestry of memories through
the art of stitching. With the right techniques, tools, and a touch of
creativity, cherished photographs can be transformed into timeless and
personalized works of art. Whether creating custom portraits, special occasion
keepsakes, or unique gifts, photo digitizing adds a new dimension to the world
of embroidery, turning each stitch into a thread of nostalgia and emotion.


